
Uploading Ad Assets and Properties
Once you've selected your campaign format, you'll land on the Creatives step, where you upload assets specific to that format. Each ad type has its own required fields, file formats, and size limits.
How to Upload Display Assets
- Drag your image files into the upload zone, or click browse to select them manually.

- Use the device icons above the preview to check how your ad looks on mobile, tablet, and desktop.
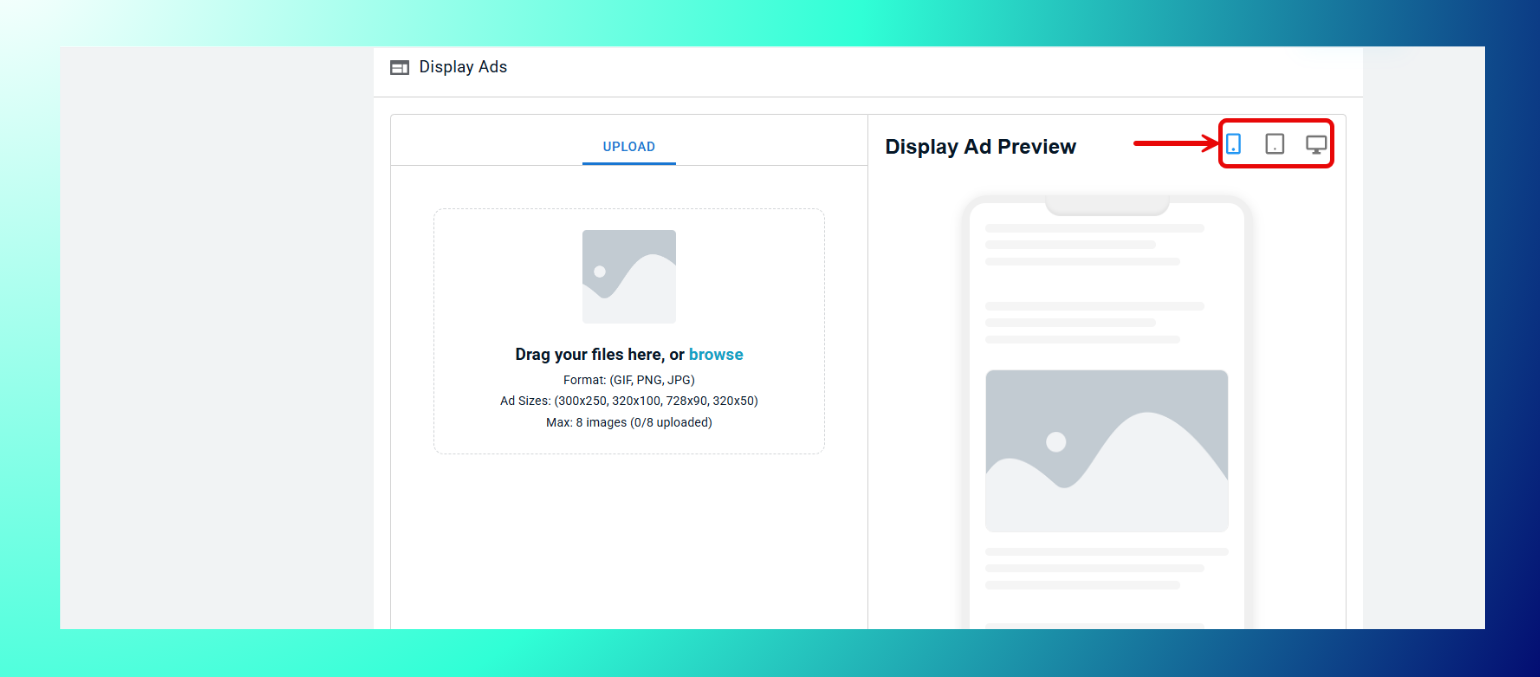
- Upload up to 8 images per campaign.
Specs
- Format: GIF, PNG, JPG.
- Accepted sizes: 300x250, 320x100, 728x90, 320x50.
How to Upload Native Assets
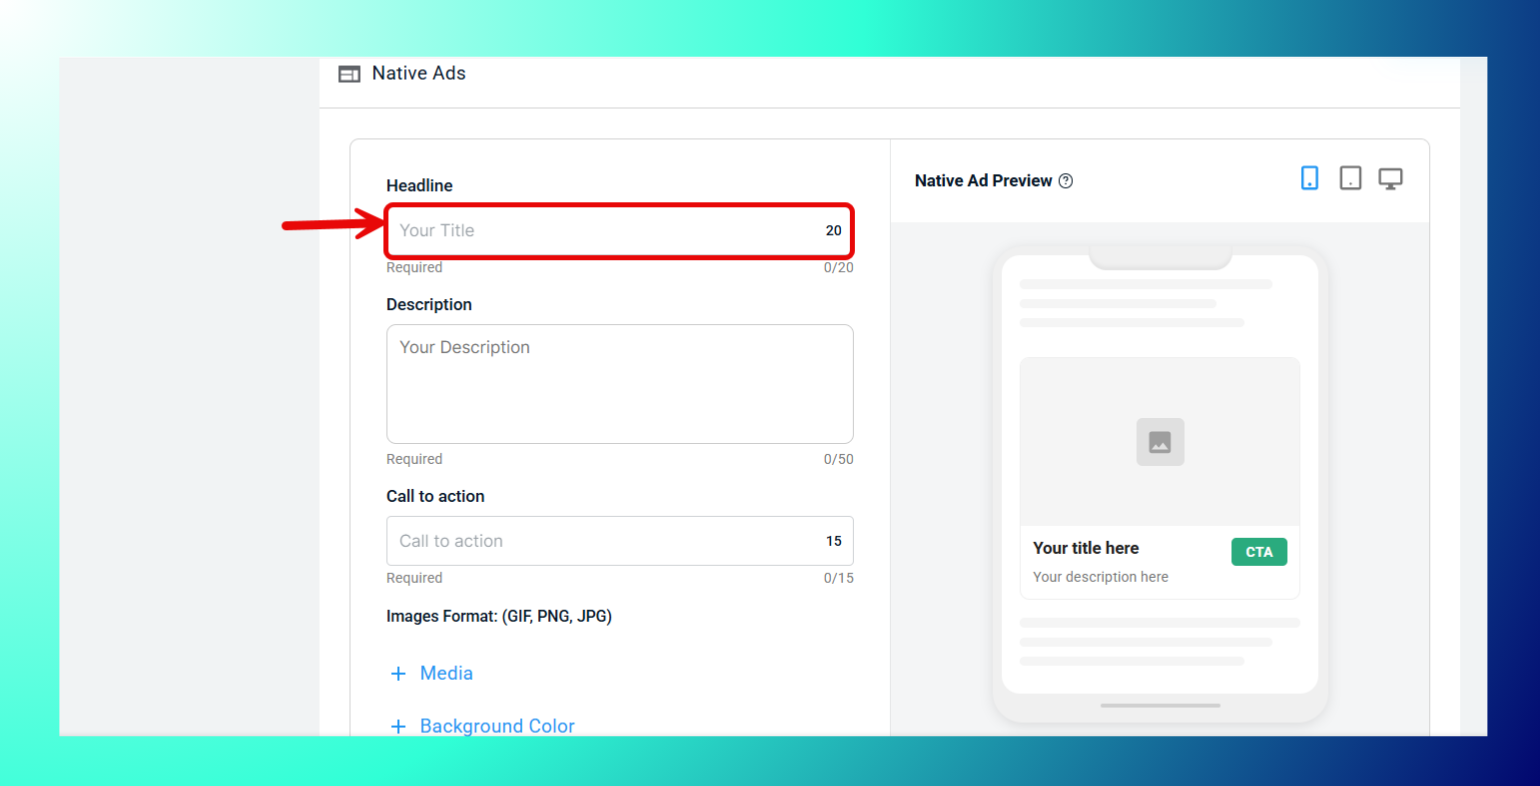
- Enter your Headline (required).
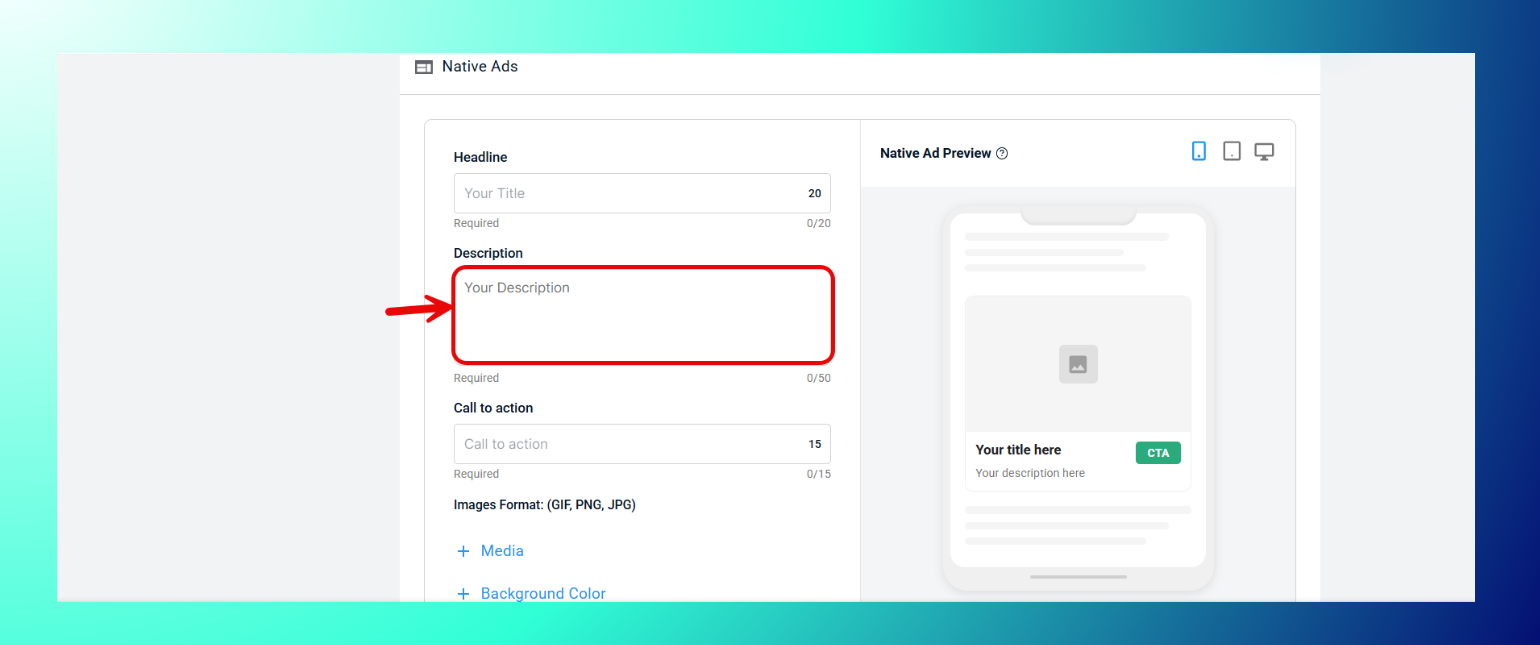
- Enter your Description (required).
- Enter your Call to Action text (required).
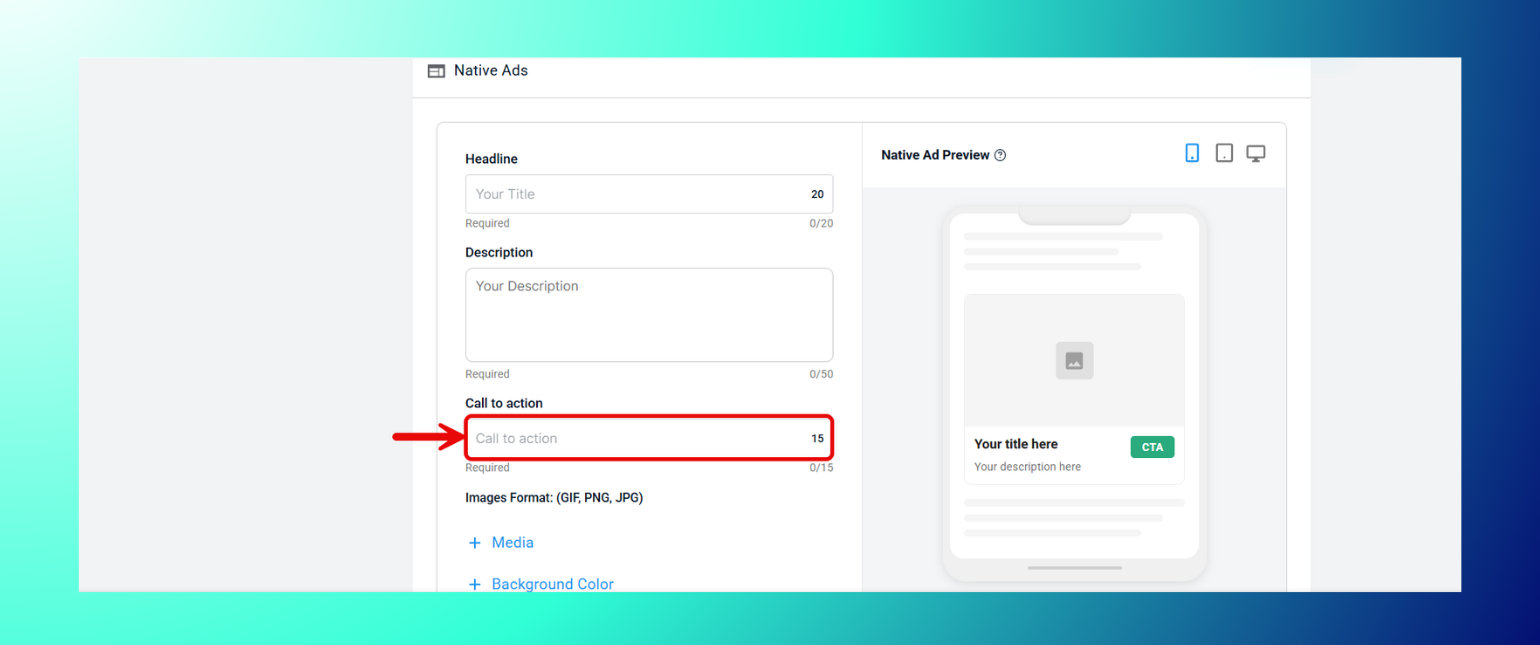
- Optionally expand Media, Background Color, or CTA Background Color to customize further.

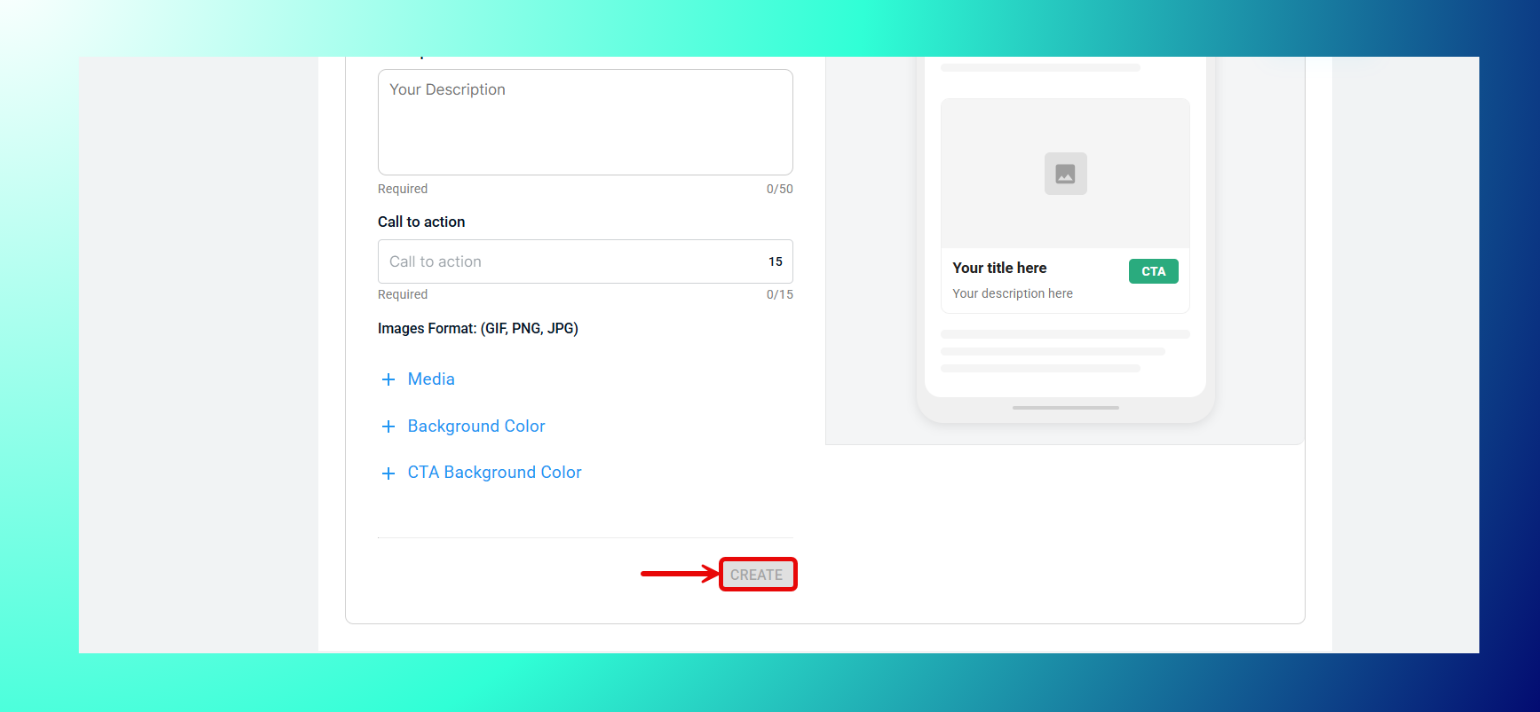
- Click Create once all required fields are filled.
Specs
- Headline: 20 characters max.
- Description: 50 characters max.
- Call to Action: 15 characters max.
- Images format: GIF, PNG, JPG.
How to Upload Flux Campaign Assets
- Flux Campaign creatives are uploaded the same way as standalone Display and Native ads. You can switch between the Display Ads and Native Ads tabs to upload each.
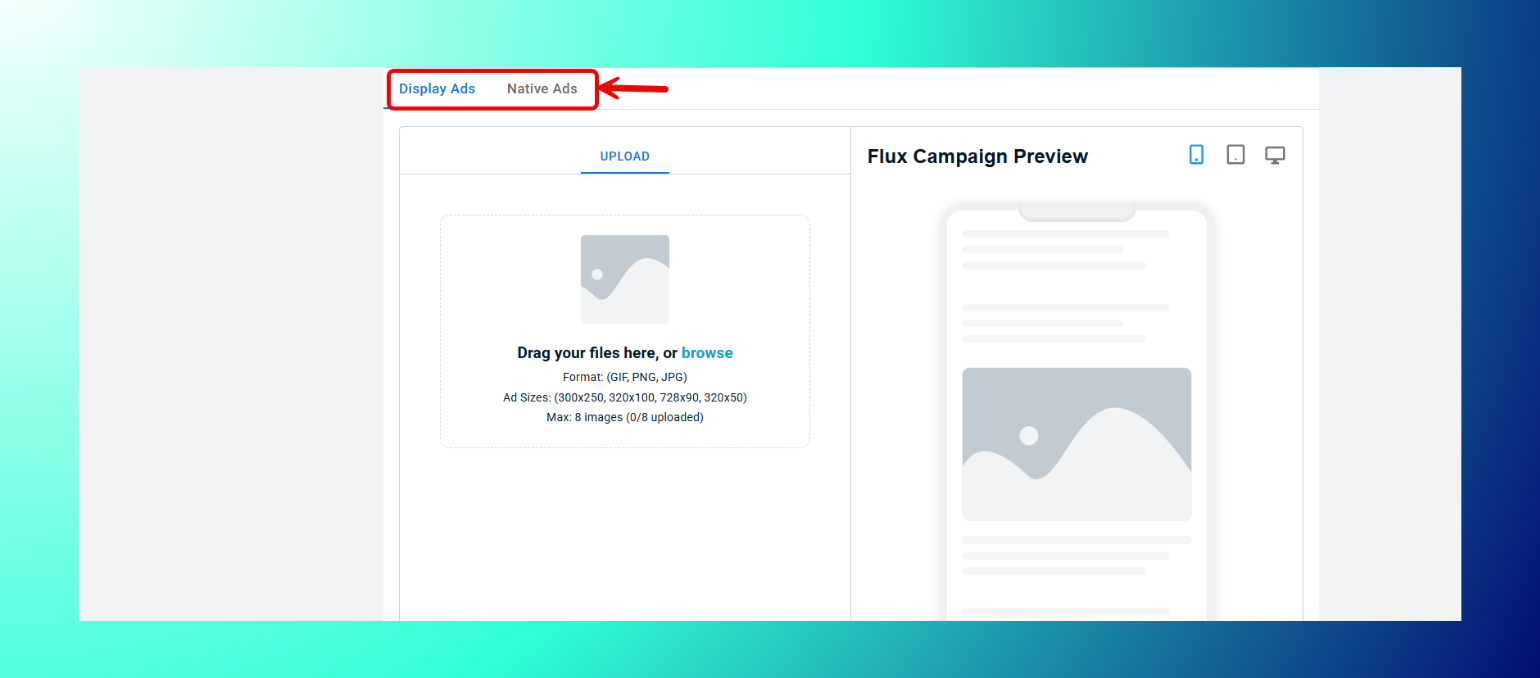
- Follow the same steps and specs as How to Upload Display Assets and How to Upload Native Assets above.
Note: The creative upload step for Flux Campaign is functionally identical to Performance Max, as both only offer Display and Native formats at this stage.
How to Upload Performance Max Assets
- Performance Max creatives are uploaded the same way as standalone Display and Native ads. You can switch between the Display Ads and Native Ads tabs to upload each.
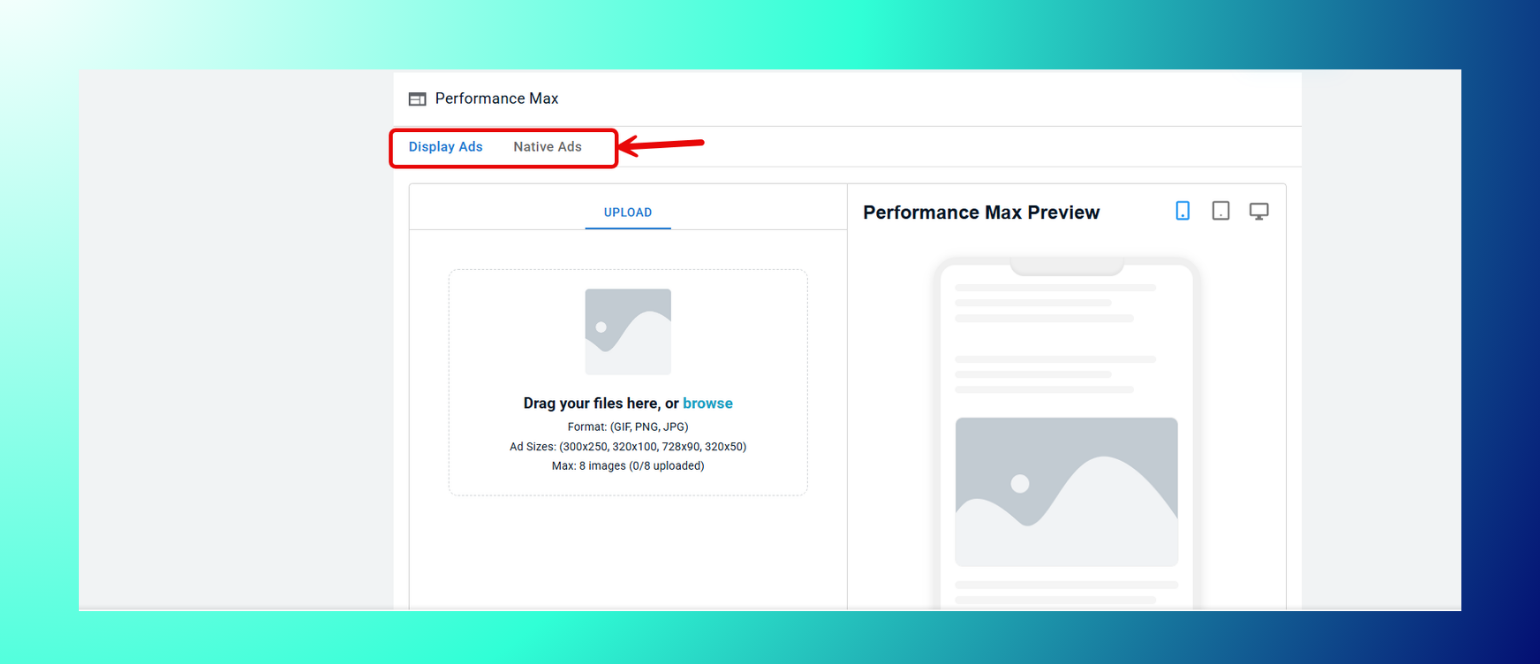
- Follow the same steps and specs as How to Upload Display Assets and How to Upload Native Assets above.
How to Upload HTML5 Assets
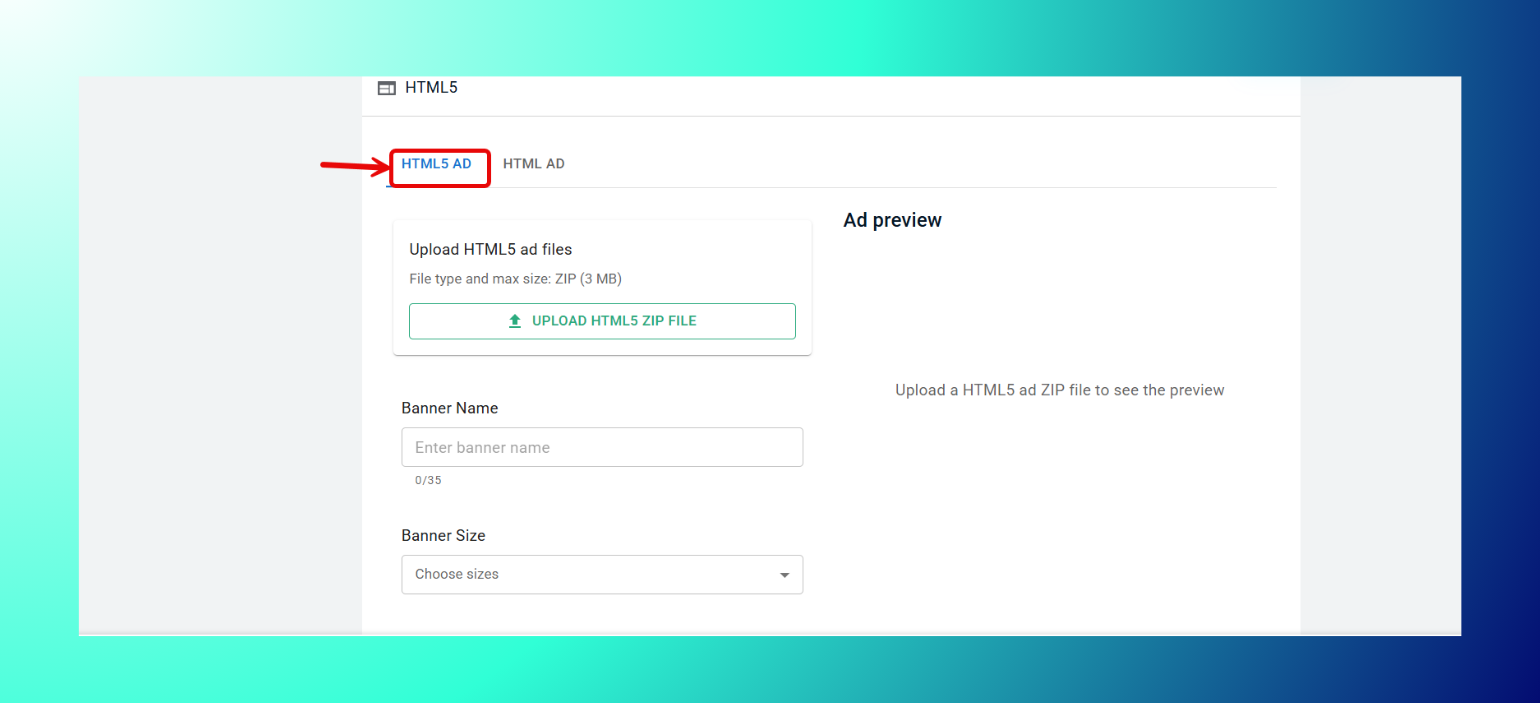
Use HTML5 Ad if you have a packaged ZIP file (common for animated/interactive banners built in tools like Google Web Designer).
- Choose the HTML5 Ad tab.
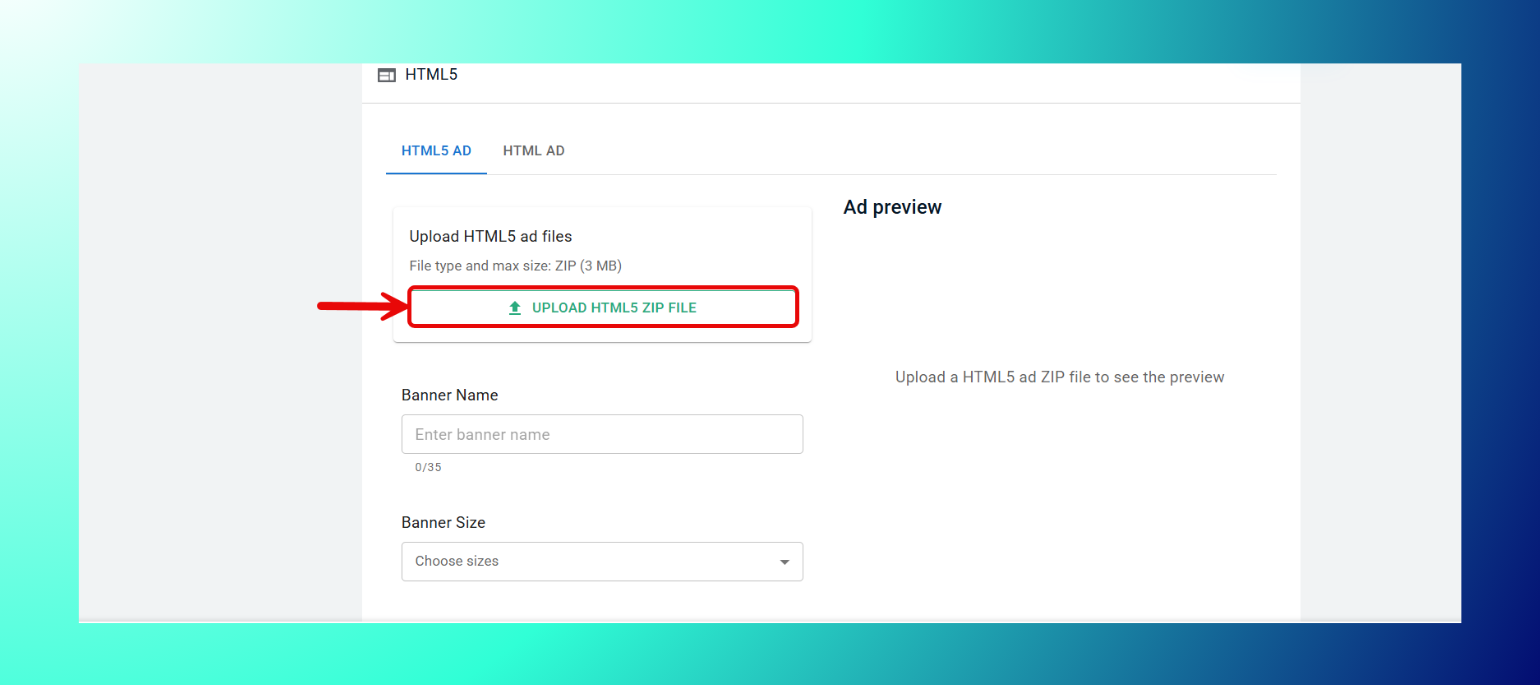
- Click Upload HTML5 ZIP File and select your file.
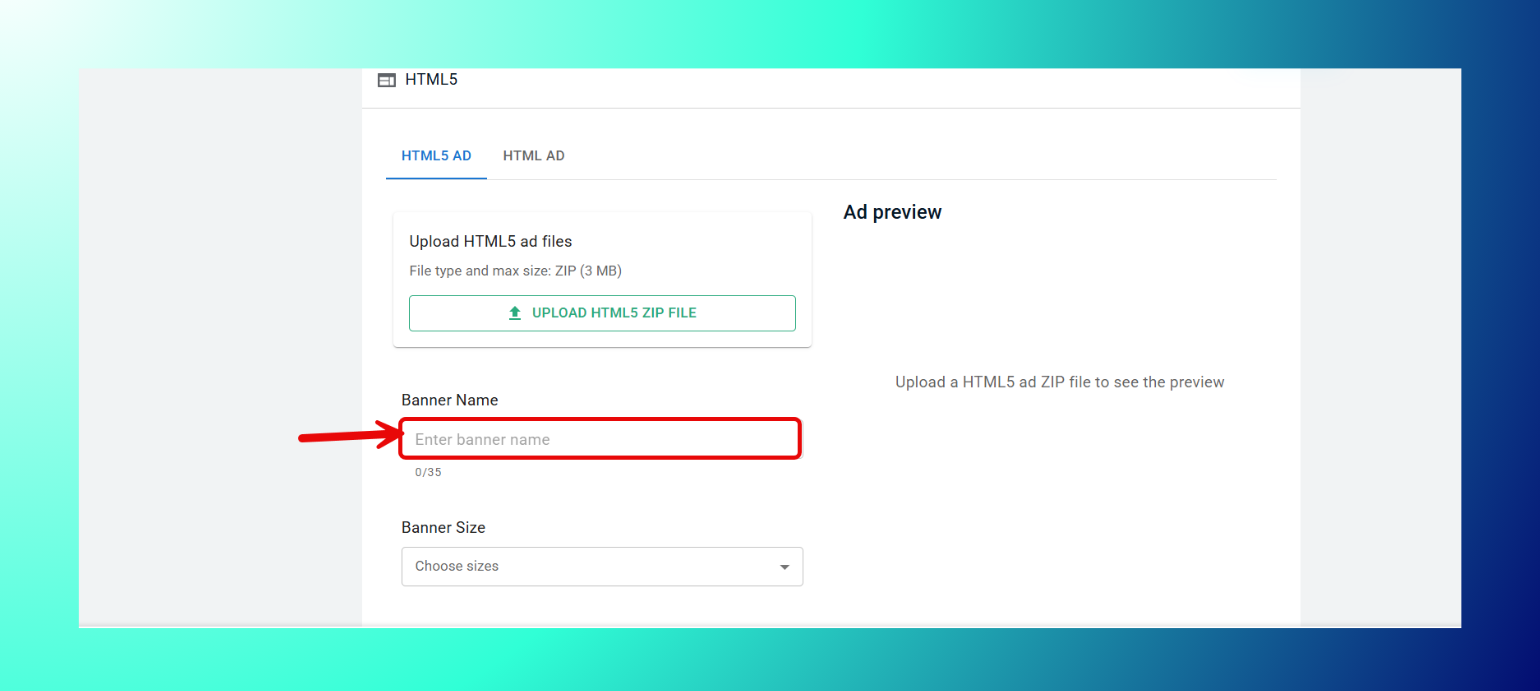
- Enter a Banner Name.
- Select a Banner Size from the dropdown.

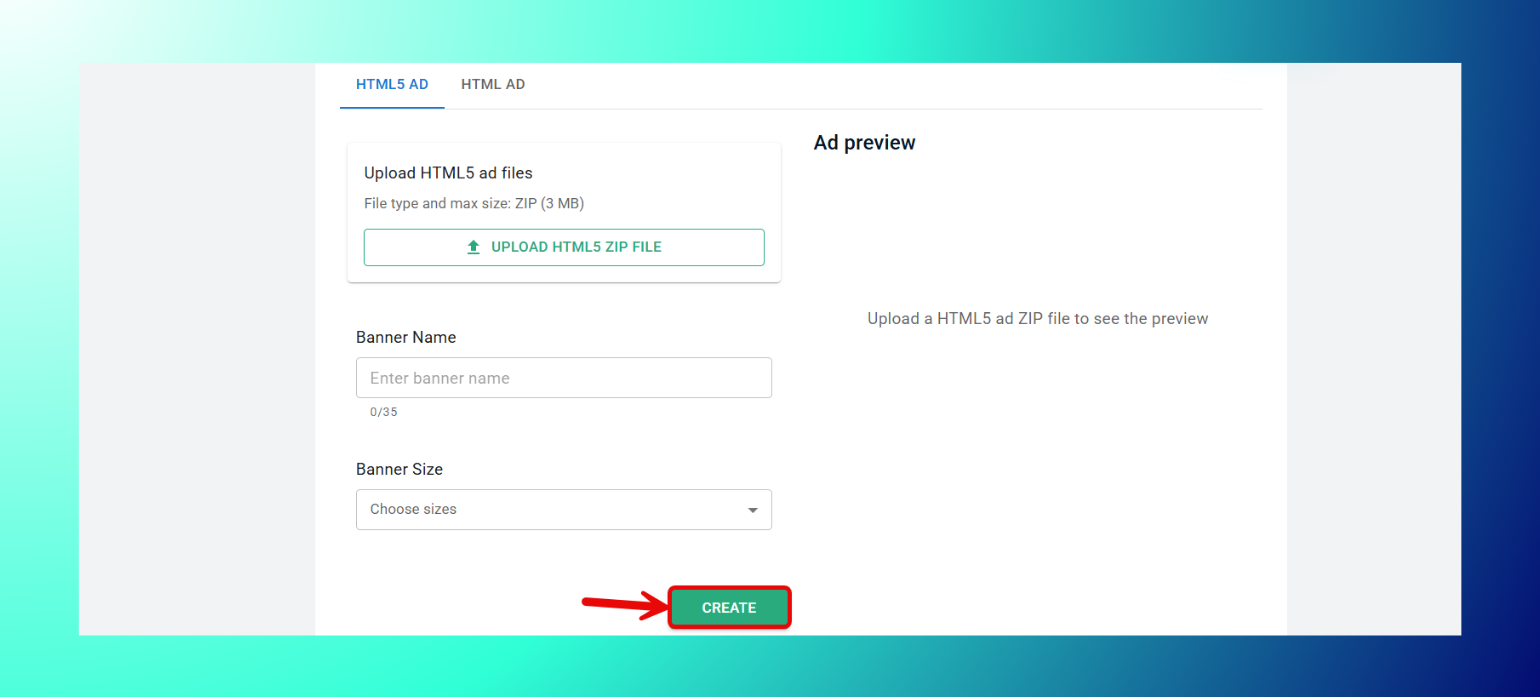
- Click Create.
Specs
- File type: ZIP.
- Max size: 3MB.
- Banner Name: 35 characters max.
Use HTML Ad if you're pasting raw HTML code directly.
- Choose the HTML Ad tab.
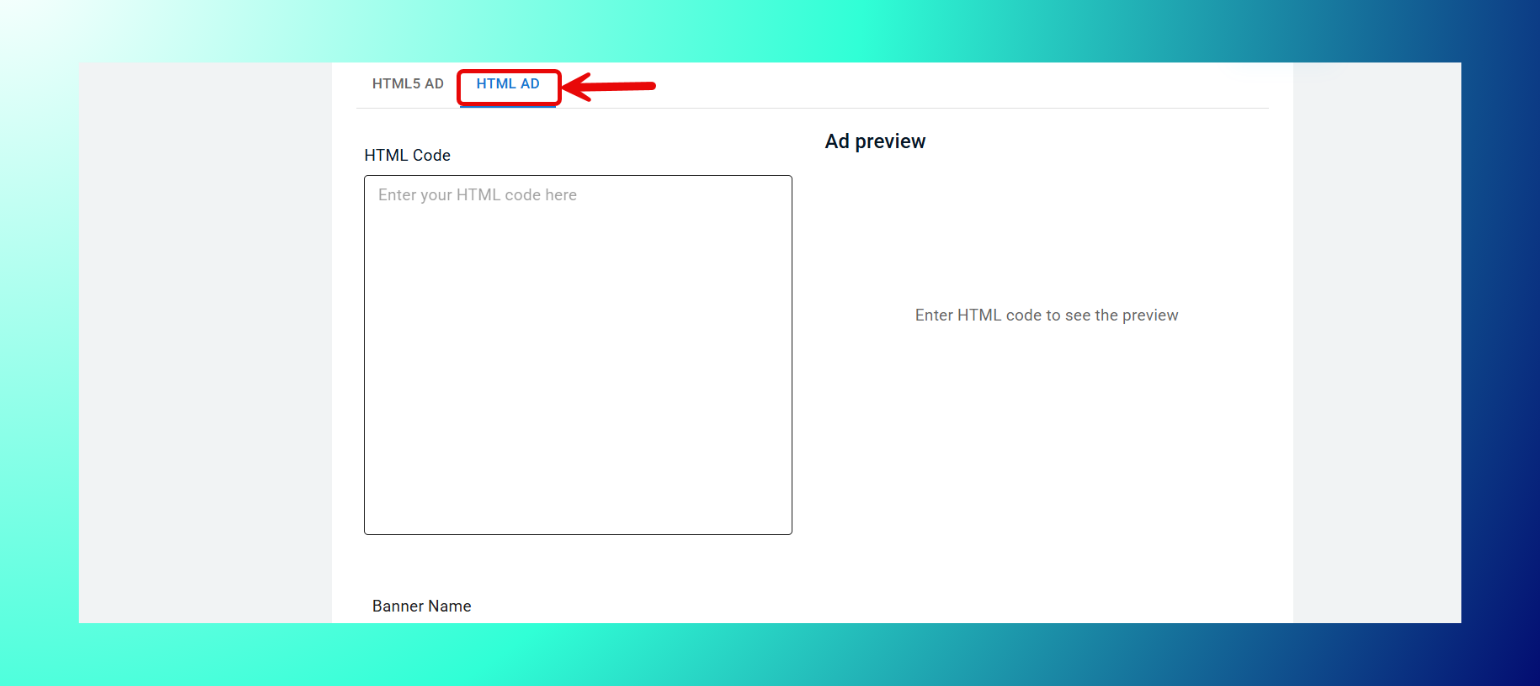
- Paste your raw HTML into the HTML Code box.
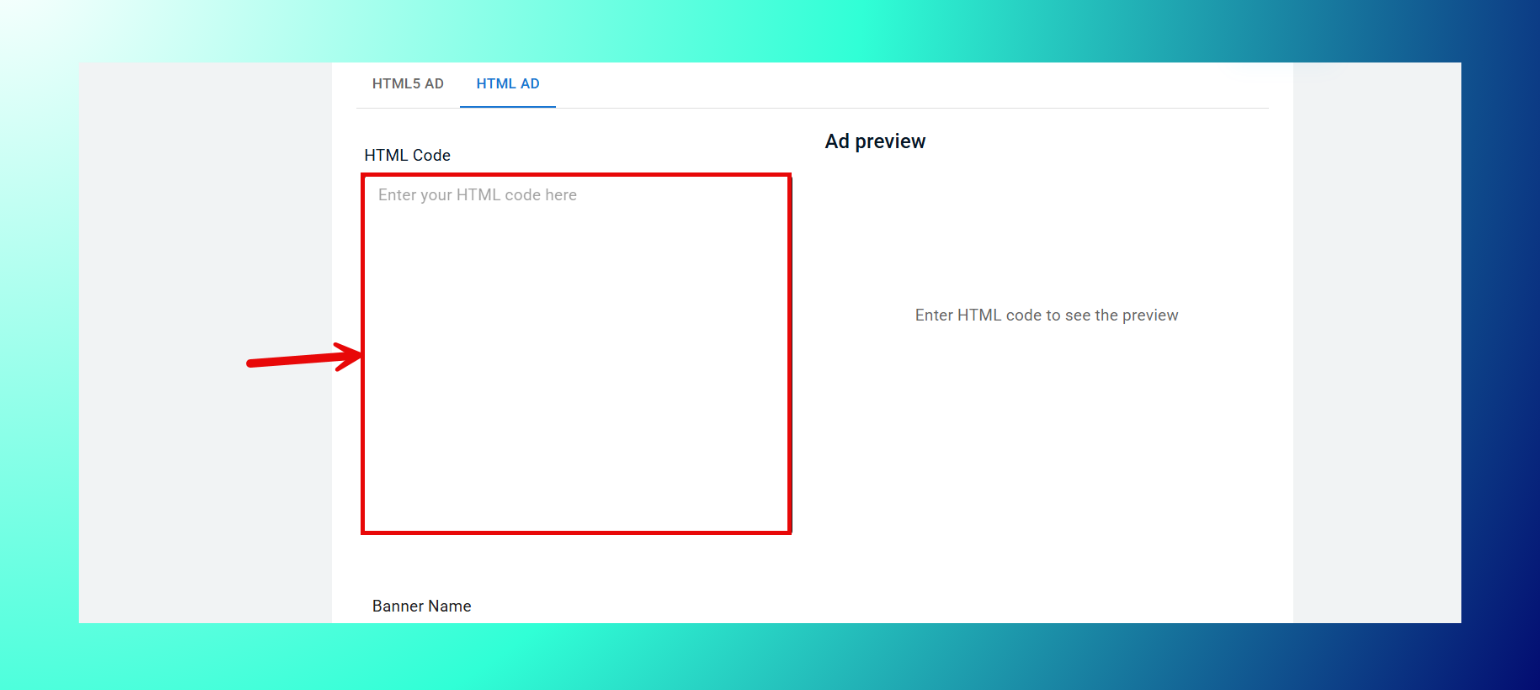
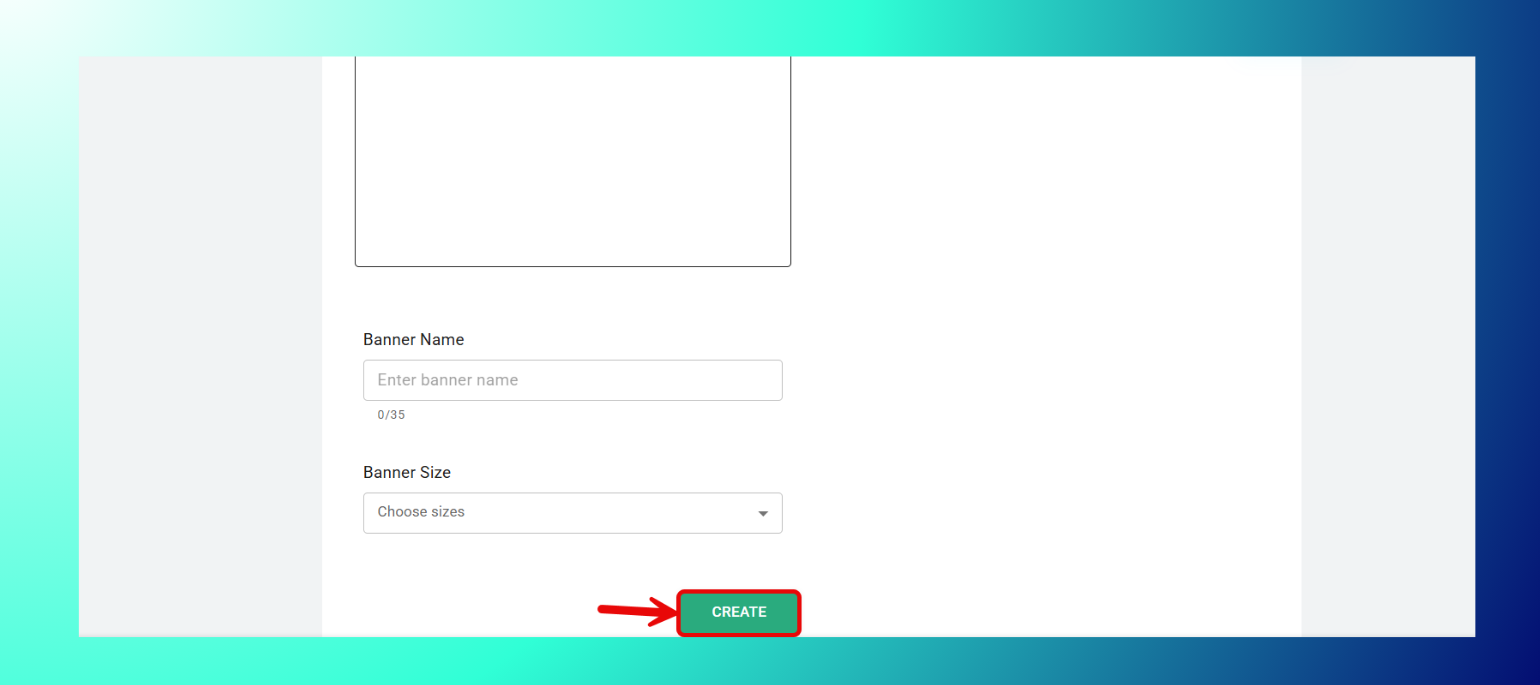
- Enter a Banner Name.

- Select a Banner Size from the dropdown.

- Click Create.
Specs
Banner Name: 35 characters max. The ad preview updates once valid HTML code is entered.
How to Upload Video Assets
- Click Upload Video File and select your video.
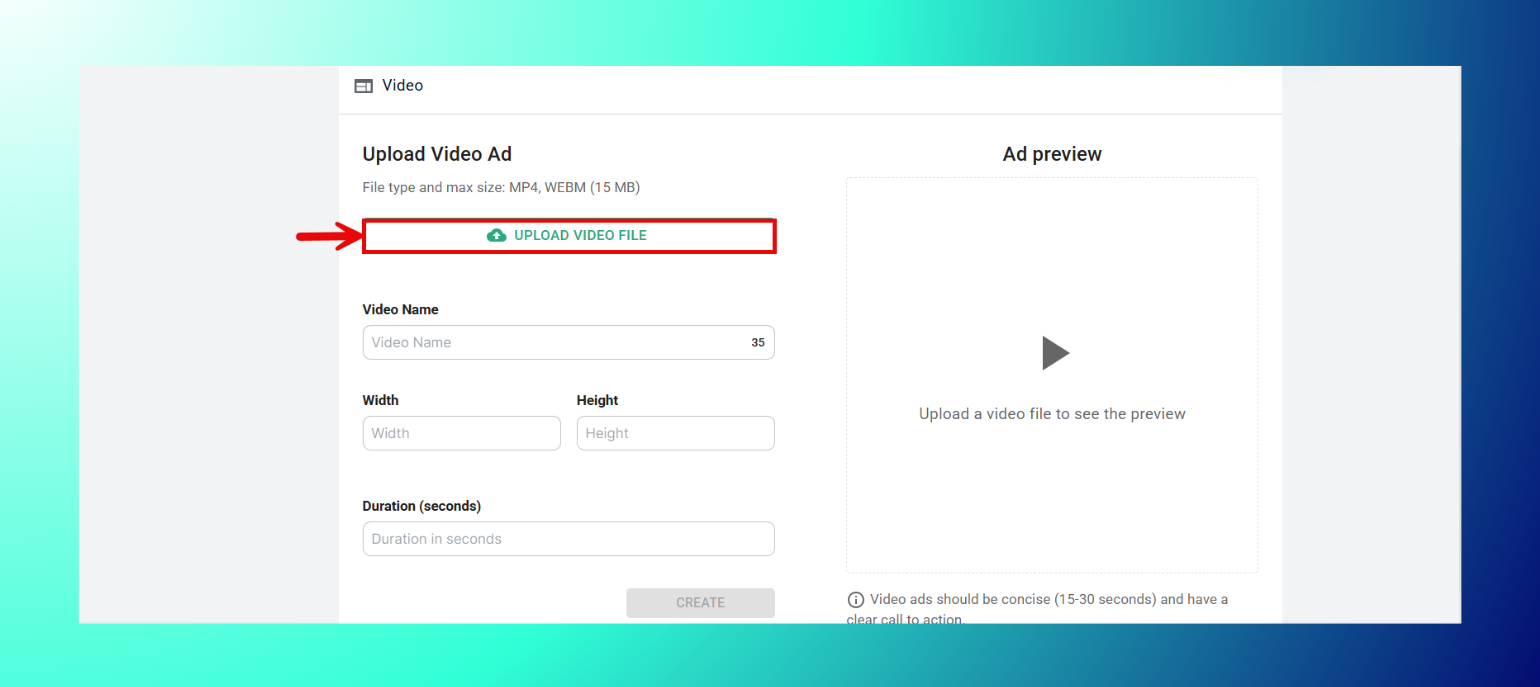
- Enter a Video Name.
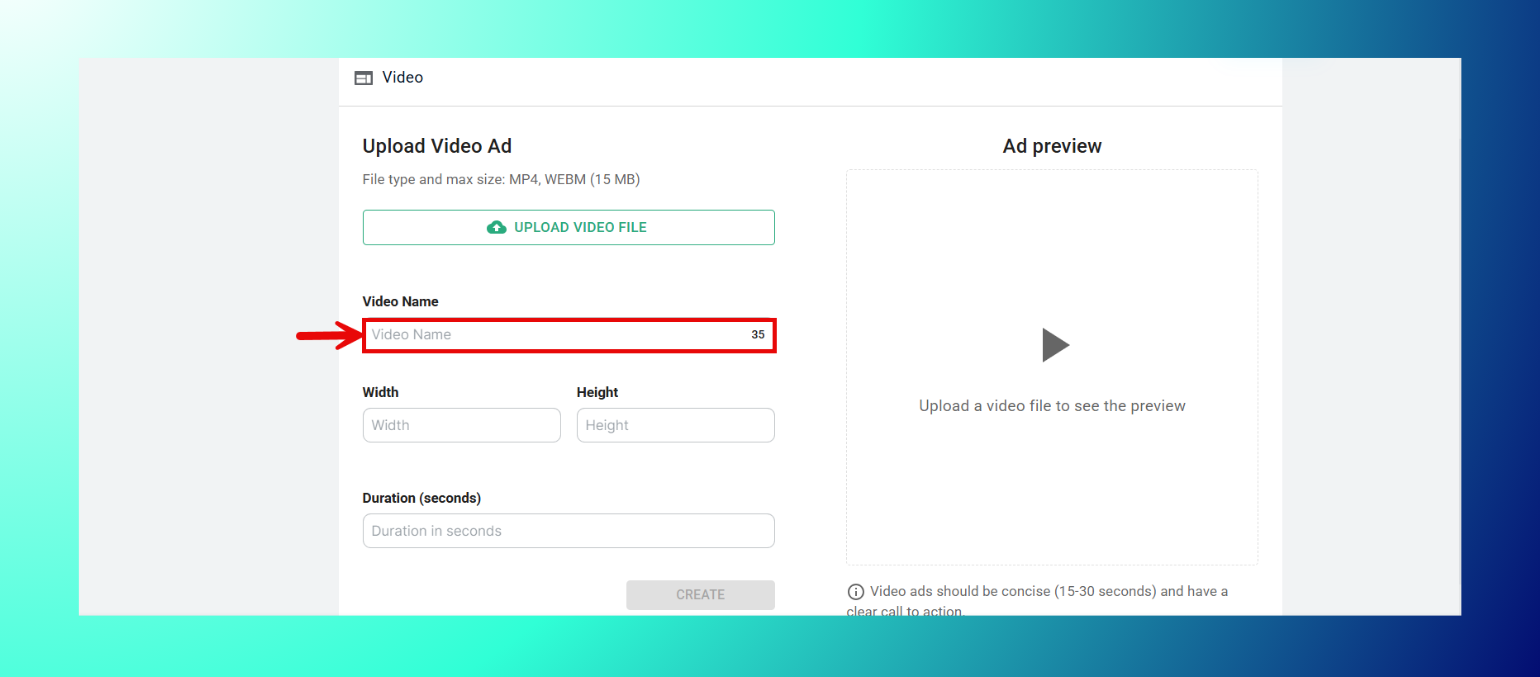
- Enter Width and Height dimensions.
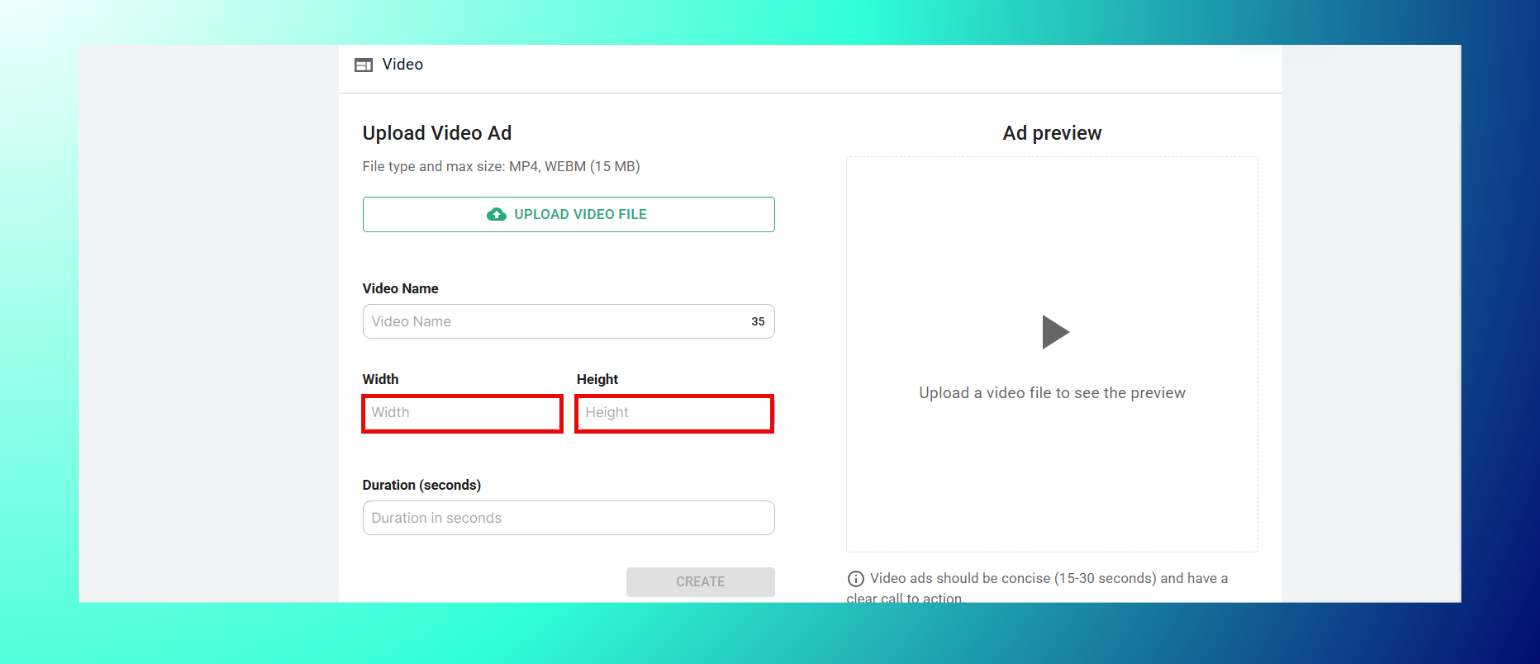
- Enter Duration in seconds.

- Click Create.
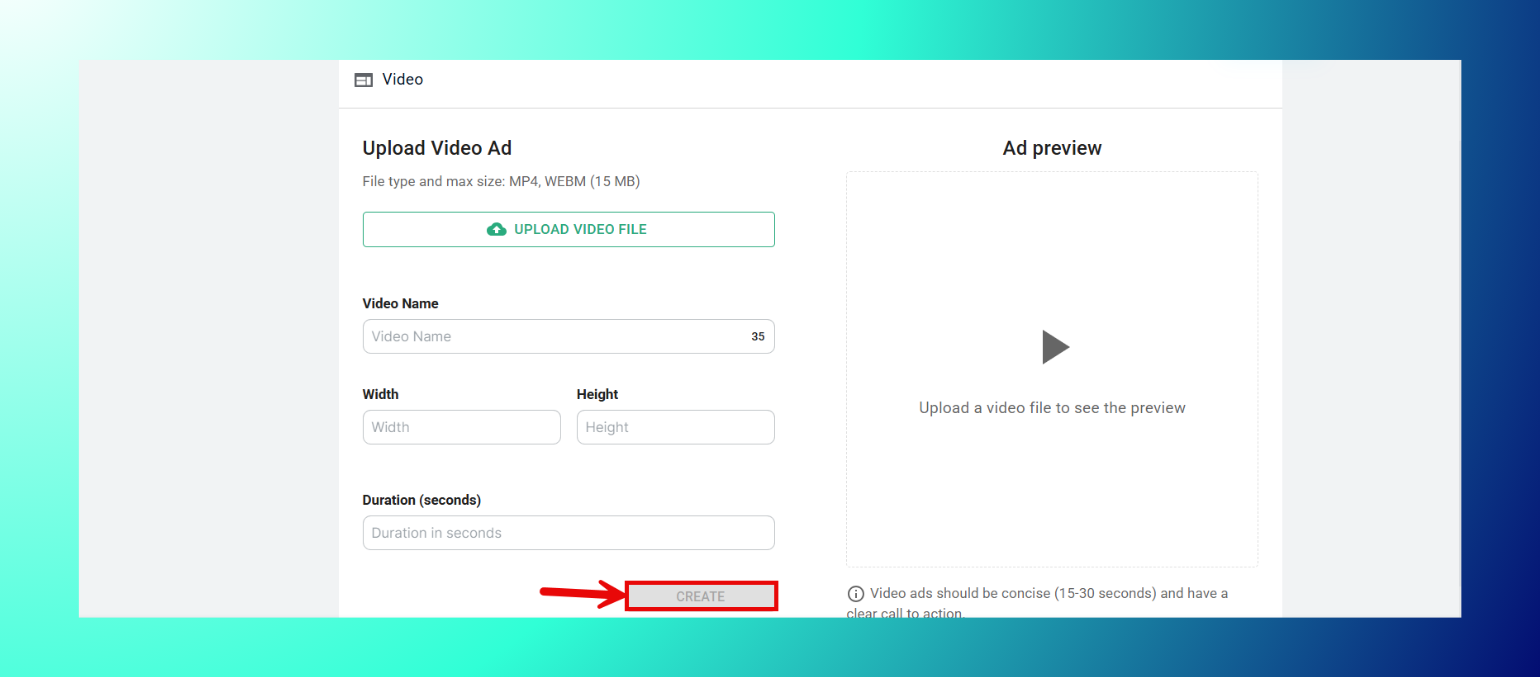
Specs
- File type: MP4, WEBM.
- Max size: 15MB.
- Recommended length: 15–30 seconds, with a clear call to action.
How to Upload Telegram Ads Assets
- Enter your Headline (required).

- Enter your Description (required).
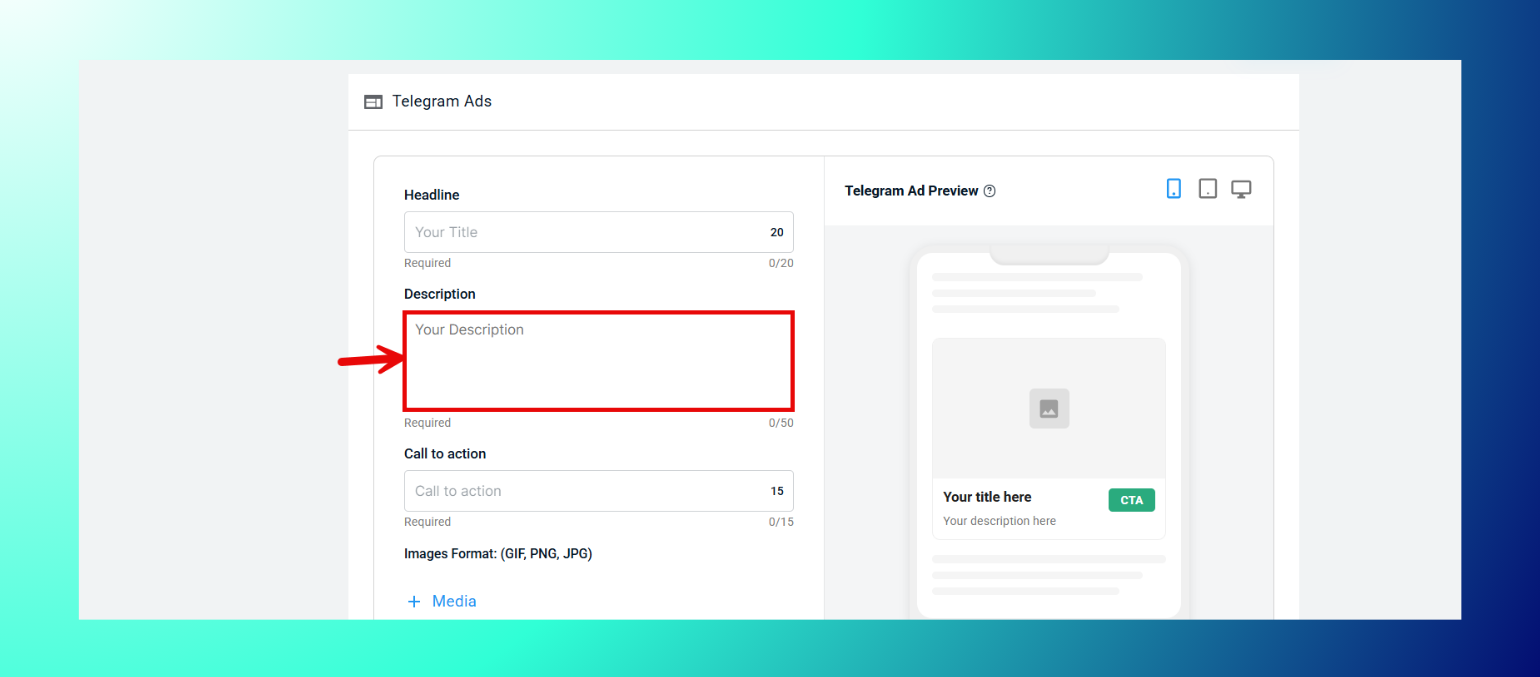
- Enter your Call to Action text (required).
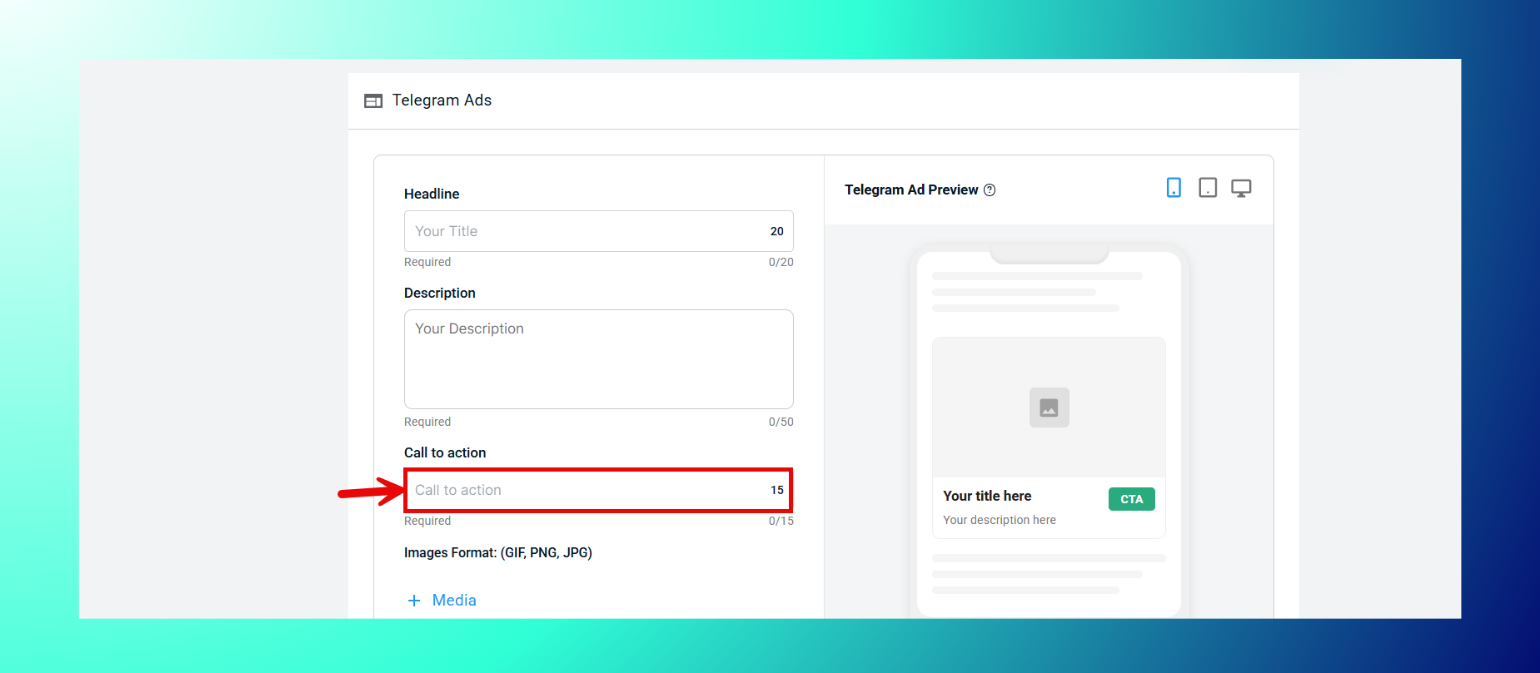
- Optionally expand Media, Background Color, or CTA Background Color.
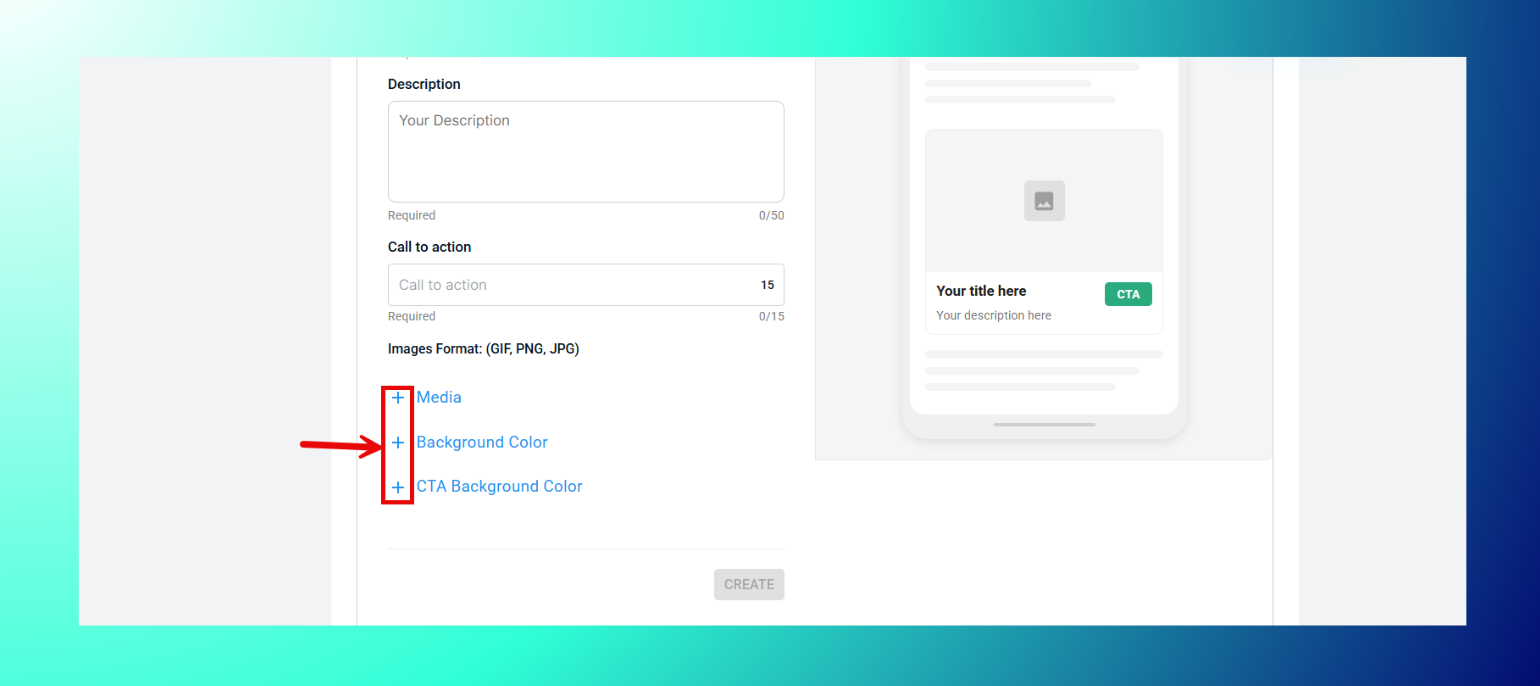
- Click Create.

Specs
- Headline: 20 characters max.
- Description: 50 characters max.
- Call to Action: 15 characters max.
- Images format: GIF, PNG, JPG.
How to Upload Mobile Ads Assets
- Drag your image files into the upload zone, or click browse.

- Upload up to 8 images per campaign.
Specs
- Format: GIF, PNG, JPG.
- Accepted sizes: 320x100, 320x50.
How to Upload Push Notification Ads Assets
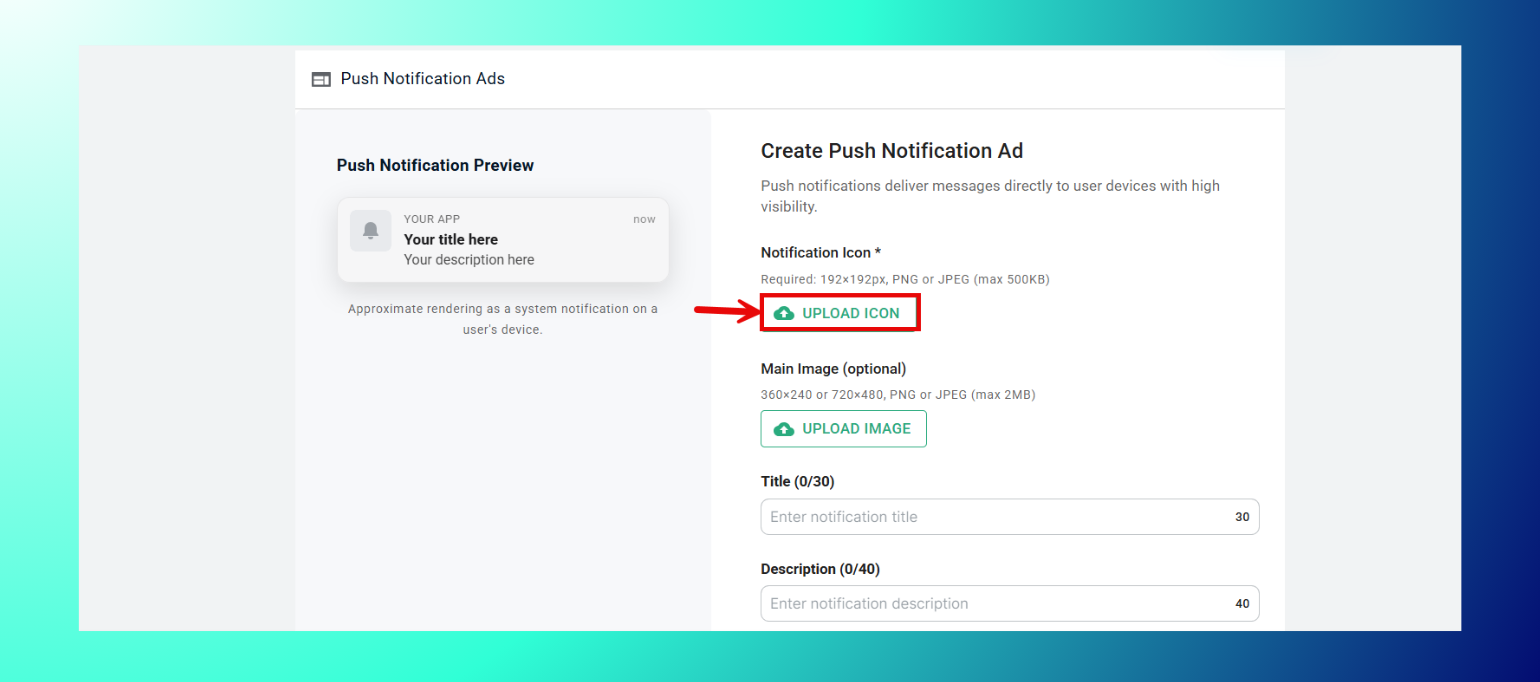
- Click Upload Icon to add your notification icon (required).
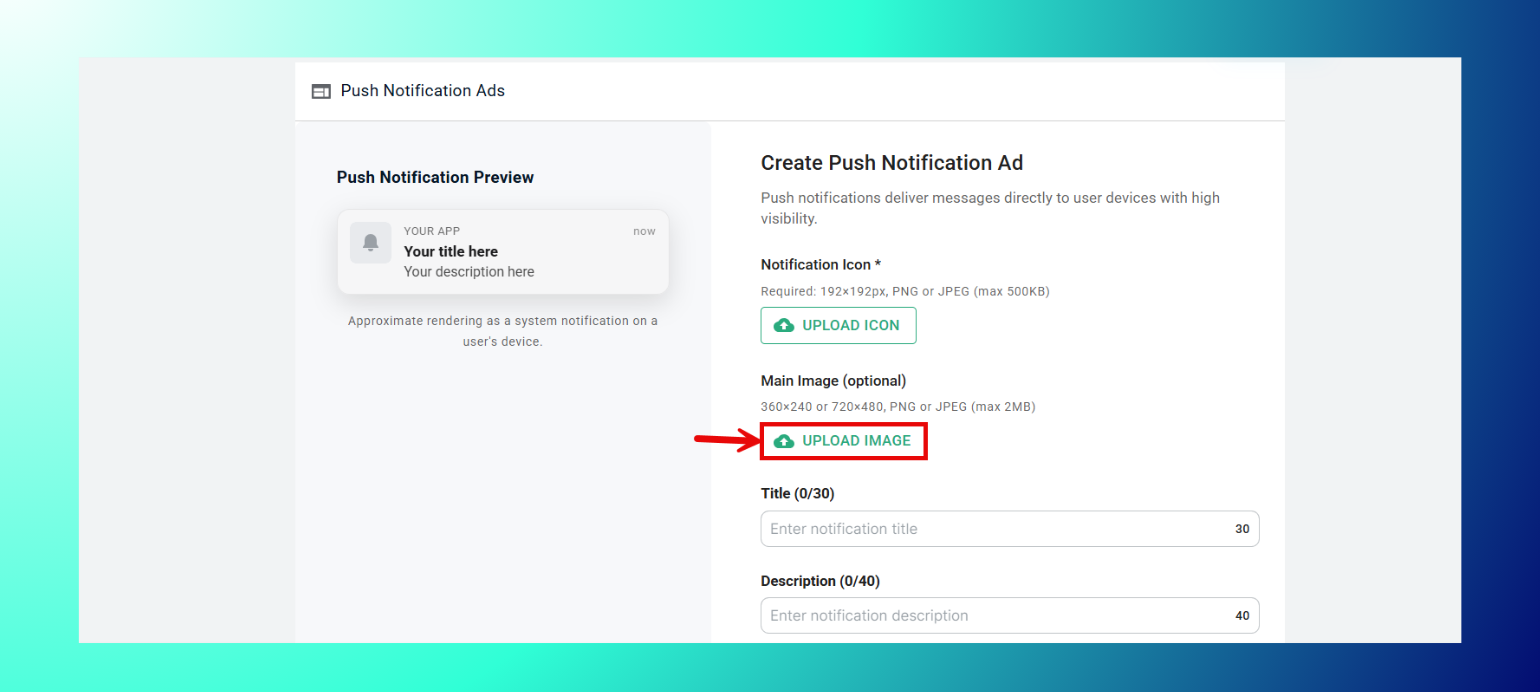
- Optionally click Upload Image to add a main image.
- Enter a Title.
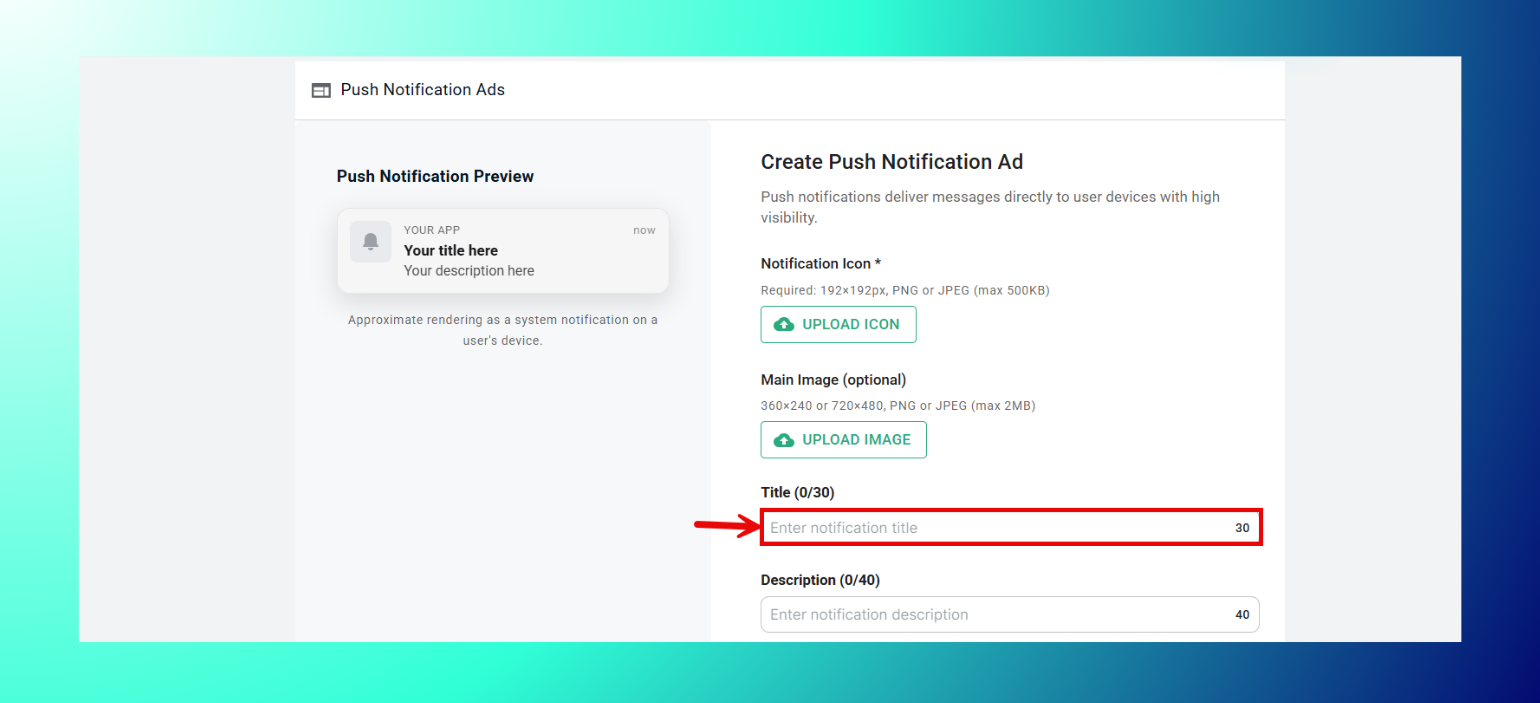
- Enter a Description.
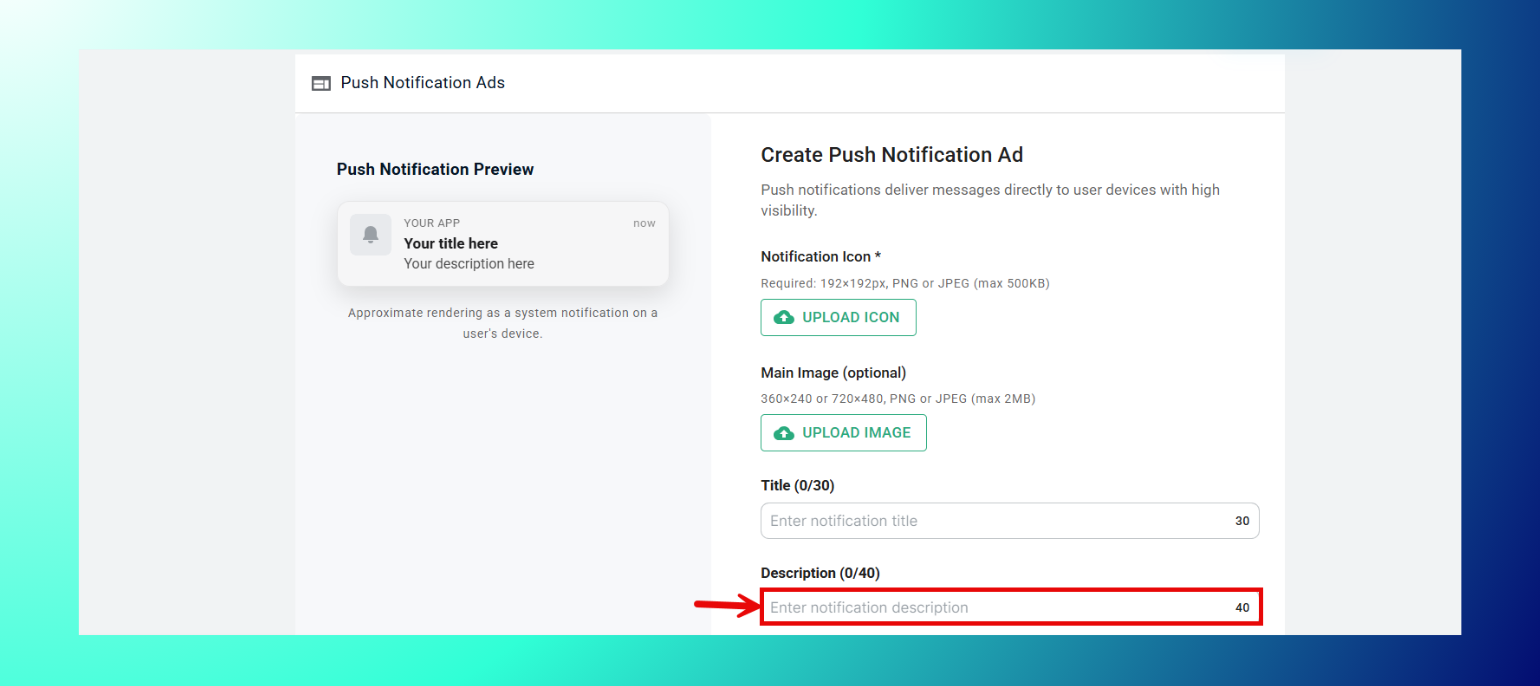
- Optionally enter Call to Action text.

- Click Add Push Creative.
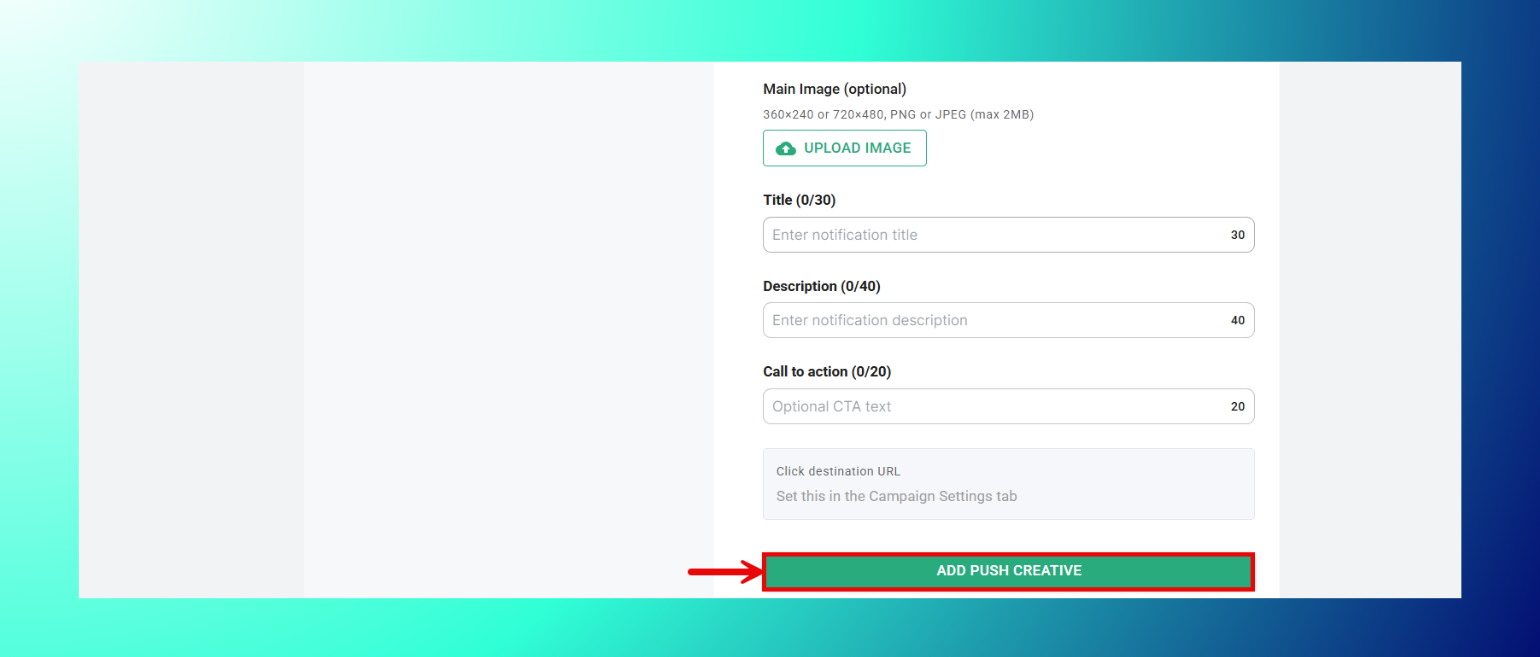
Specs
- Notification Icon: 192x192px, PNG or JPEG, max 500KB (required).
- Main Image: 360x240 or 720x480, PNG or JPEG, max 2MB (optional).
- Title: 30 characters max.
- Description: 40 characters max.
- Call to Action: 20 characters max.
Click destination URL is set separately in the Campaign Settings tab, not here.
How to Upload Pop Ads Assets
- Drag your image files into the upload zone, or click browse.

- Upload up to 8 images per campaign.
Specs
- Format: GIF, PNG, JPG.
- Accepted sizes: 300x250, 728x90.
How to Upload In-Page Push Ads Assets
- Click Upload Icon to add your notification icon (required).
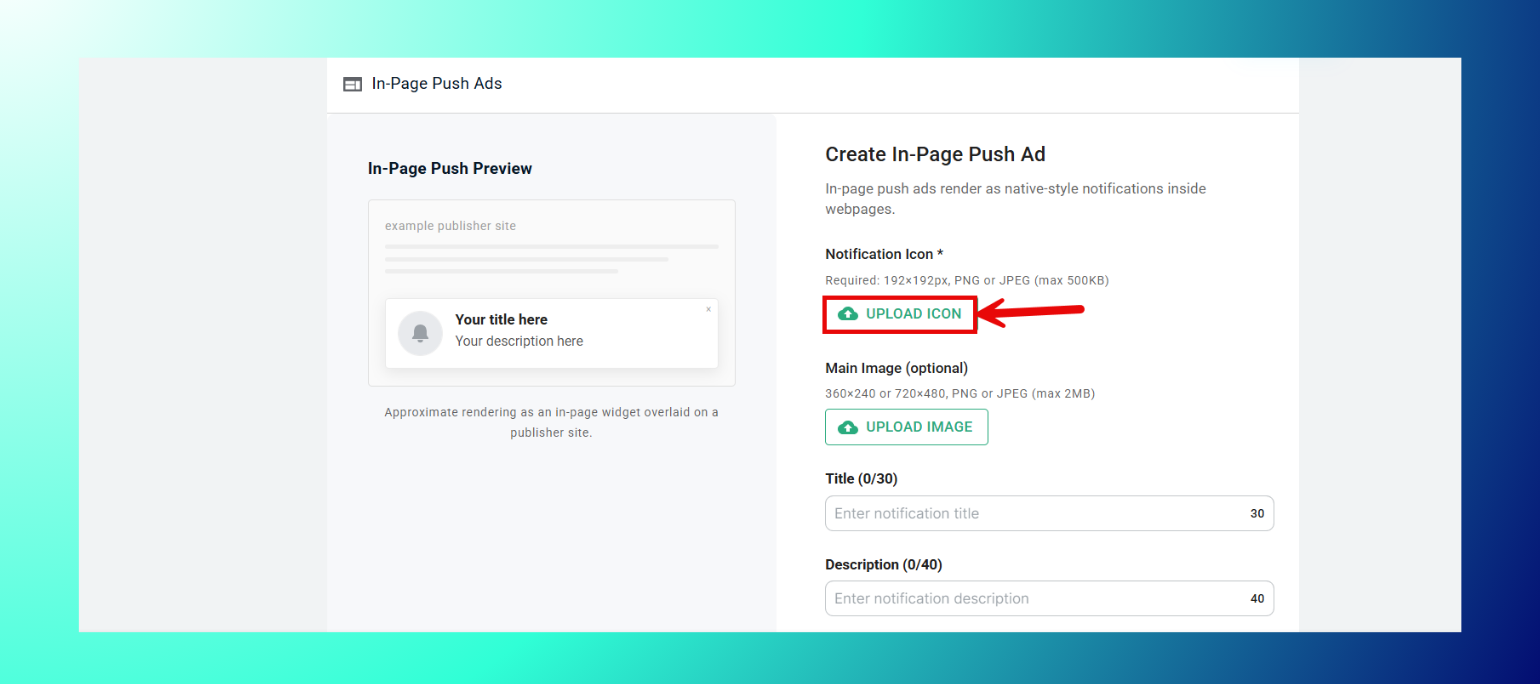
- Optionally click Upload Image to add a main image.
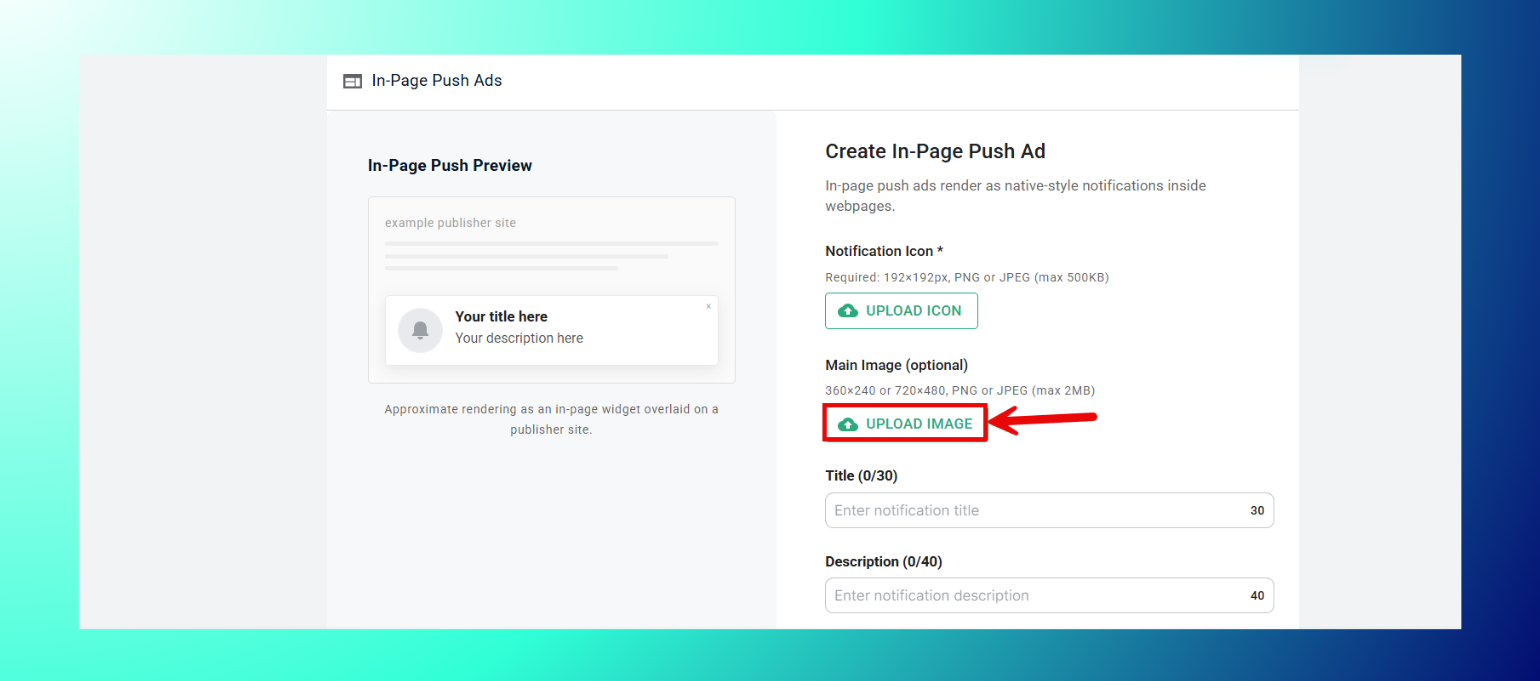
- Enter a Title.
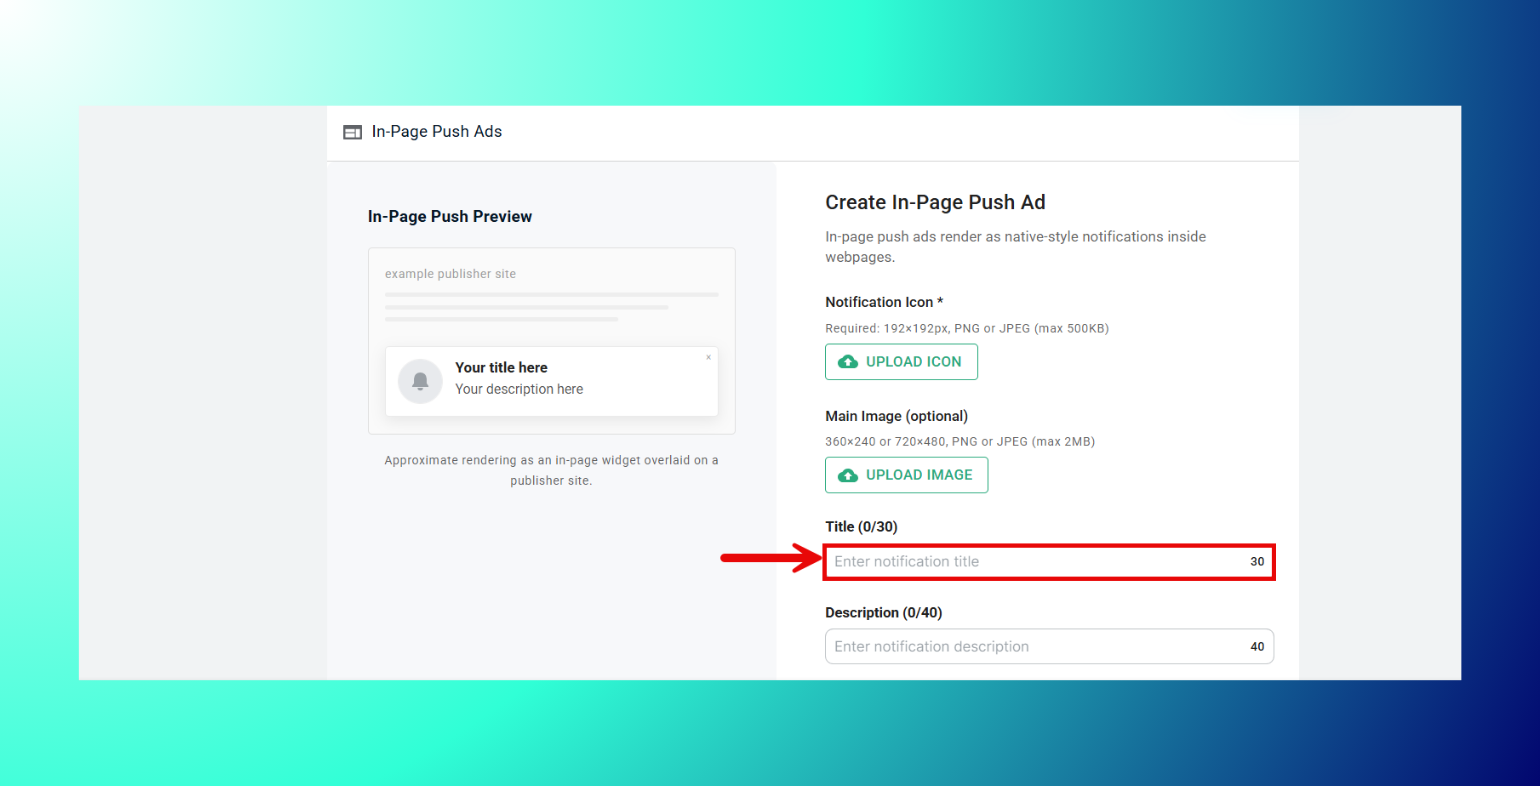
- Enter a Description.

- Optionally enter Call to Action text.
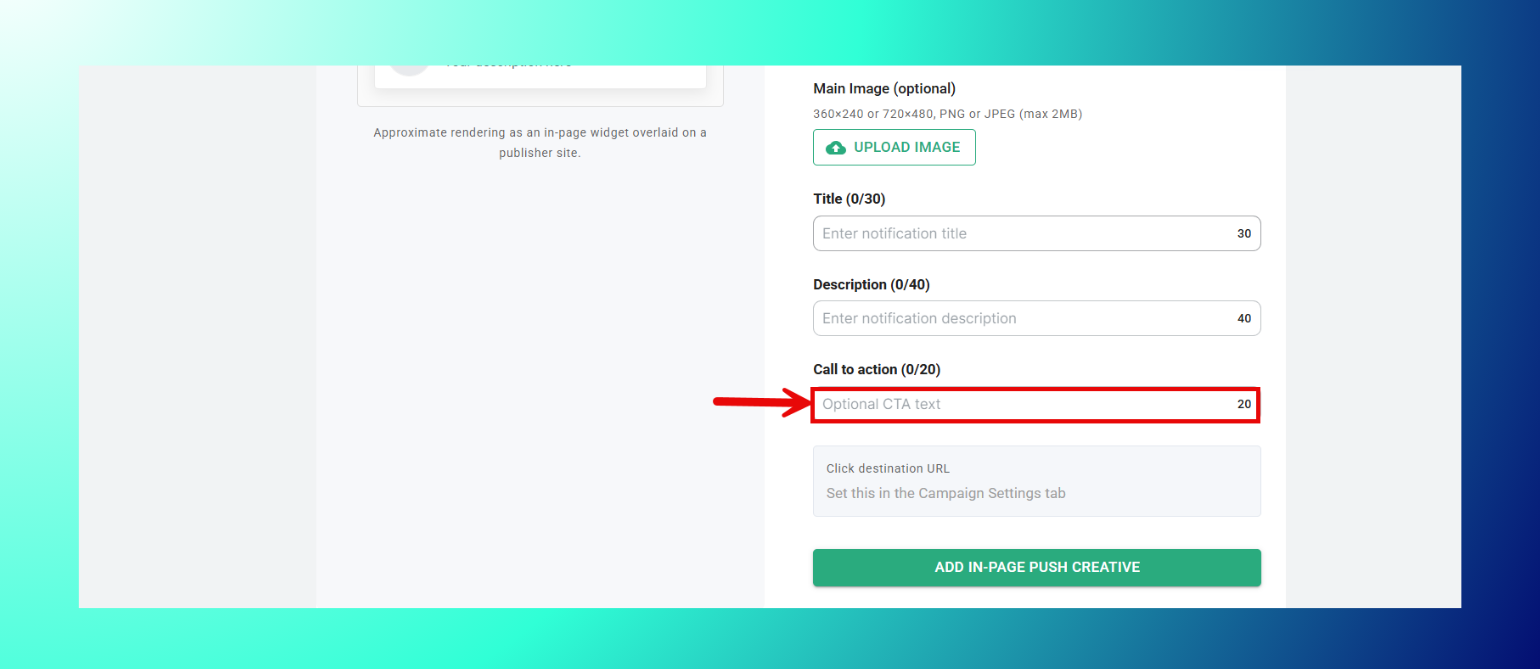
- Click Add In-Page Push Creative.

Specs
- Notification Icon: 192x192px, PNG or JPEG, max 500KB (required).
- Main Image: 360x240 or 720x480, PNG or JPEG, max 2MB (optional).
- Title: 30 characters max.
- Description: 40 characters max.
- Call to Action: 20 characters max.
Click destination URL is set separately in the Campaign Settings tab.
How to Upload Interstitial Ads Assets
- Drag your image files into the upload zone, or click browse.
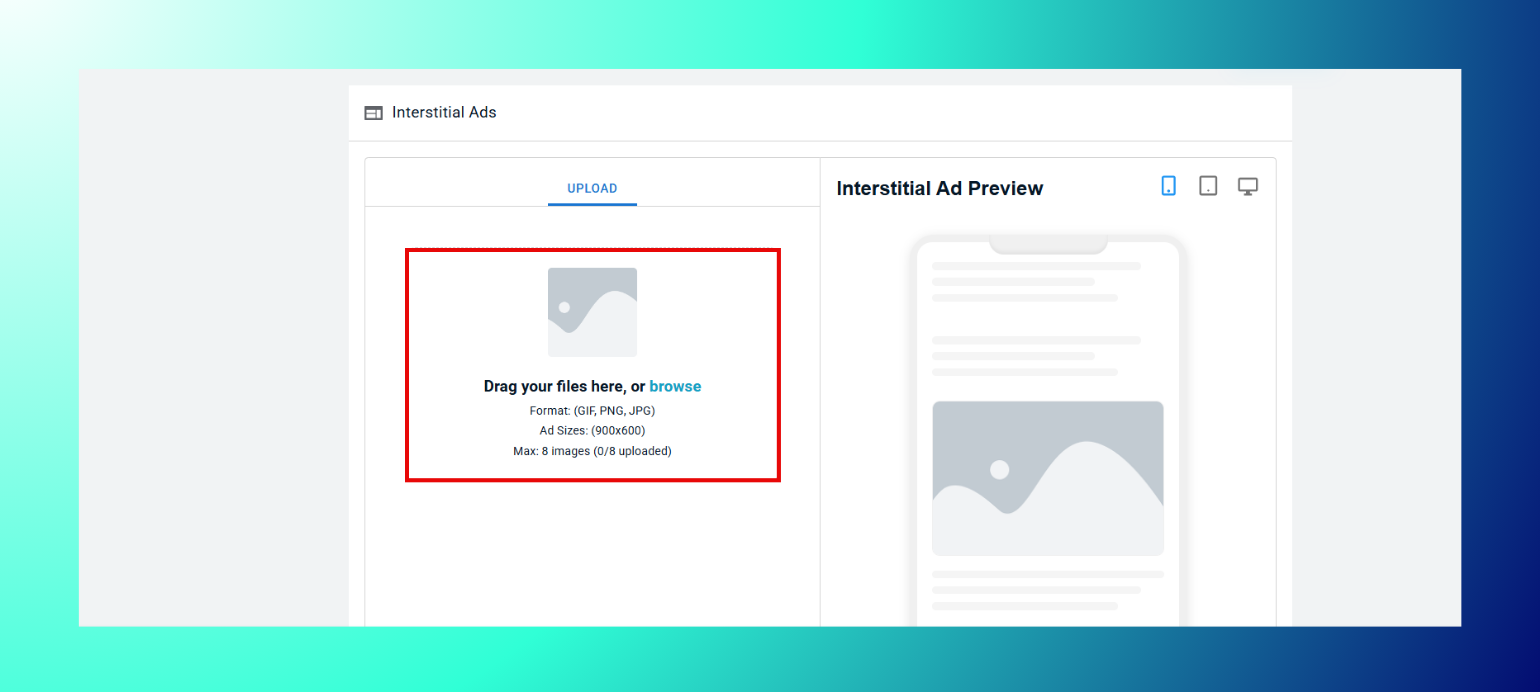
- Upload up to 8 images per campaign.
Specs
- Format: GIF, PNG, JPG.
- Accepted size: 900x600.
Best Practices: Always check the live preview before finalizing a creative, as layouts can render differently across mobile, tablet, and desktop. Keep native and push ad copy within character limits; text is truncated, not wrapped, if it's too long. For video, stay within the 15–30 second window with a clear CTA, since longer videos see steeper drop-off.
Troubleshooting
- Upload not accepted? Confirm your file matches the exact format and size listed for that ad type.
- Create button greyed out? A required field is still empty. Check the Headline, Description, and Call to Action fields, especially.
- Preview not updating? Refresh the page after uploading.