Launching a new campaign on Blockchain-Ads is straightforward with the HUB dashboard. This article provides a complete step-by-step guide to get your campaign live.
Steps to Launch a New Campaign
1. Log in to HUB and click on "Create New Campaign."
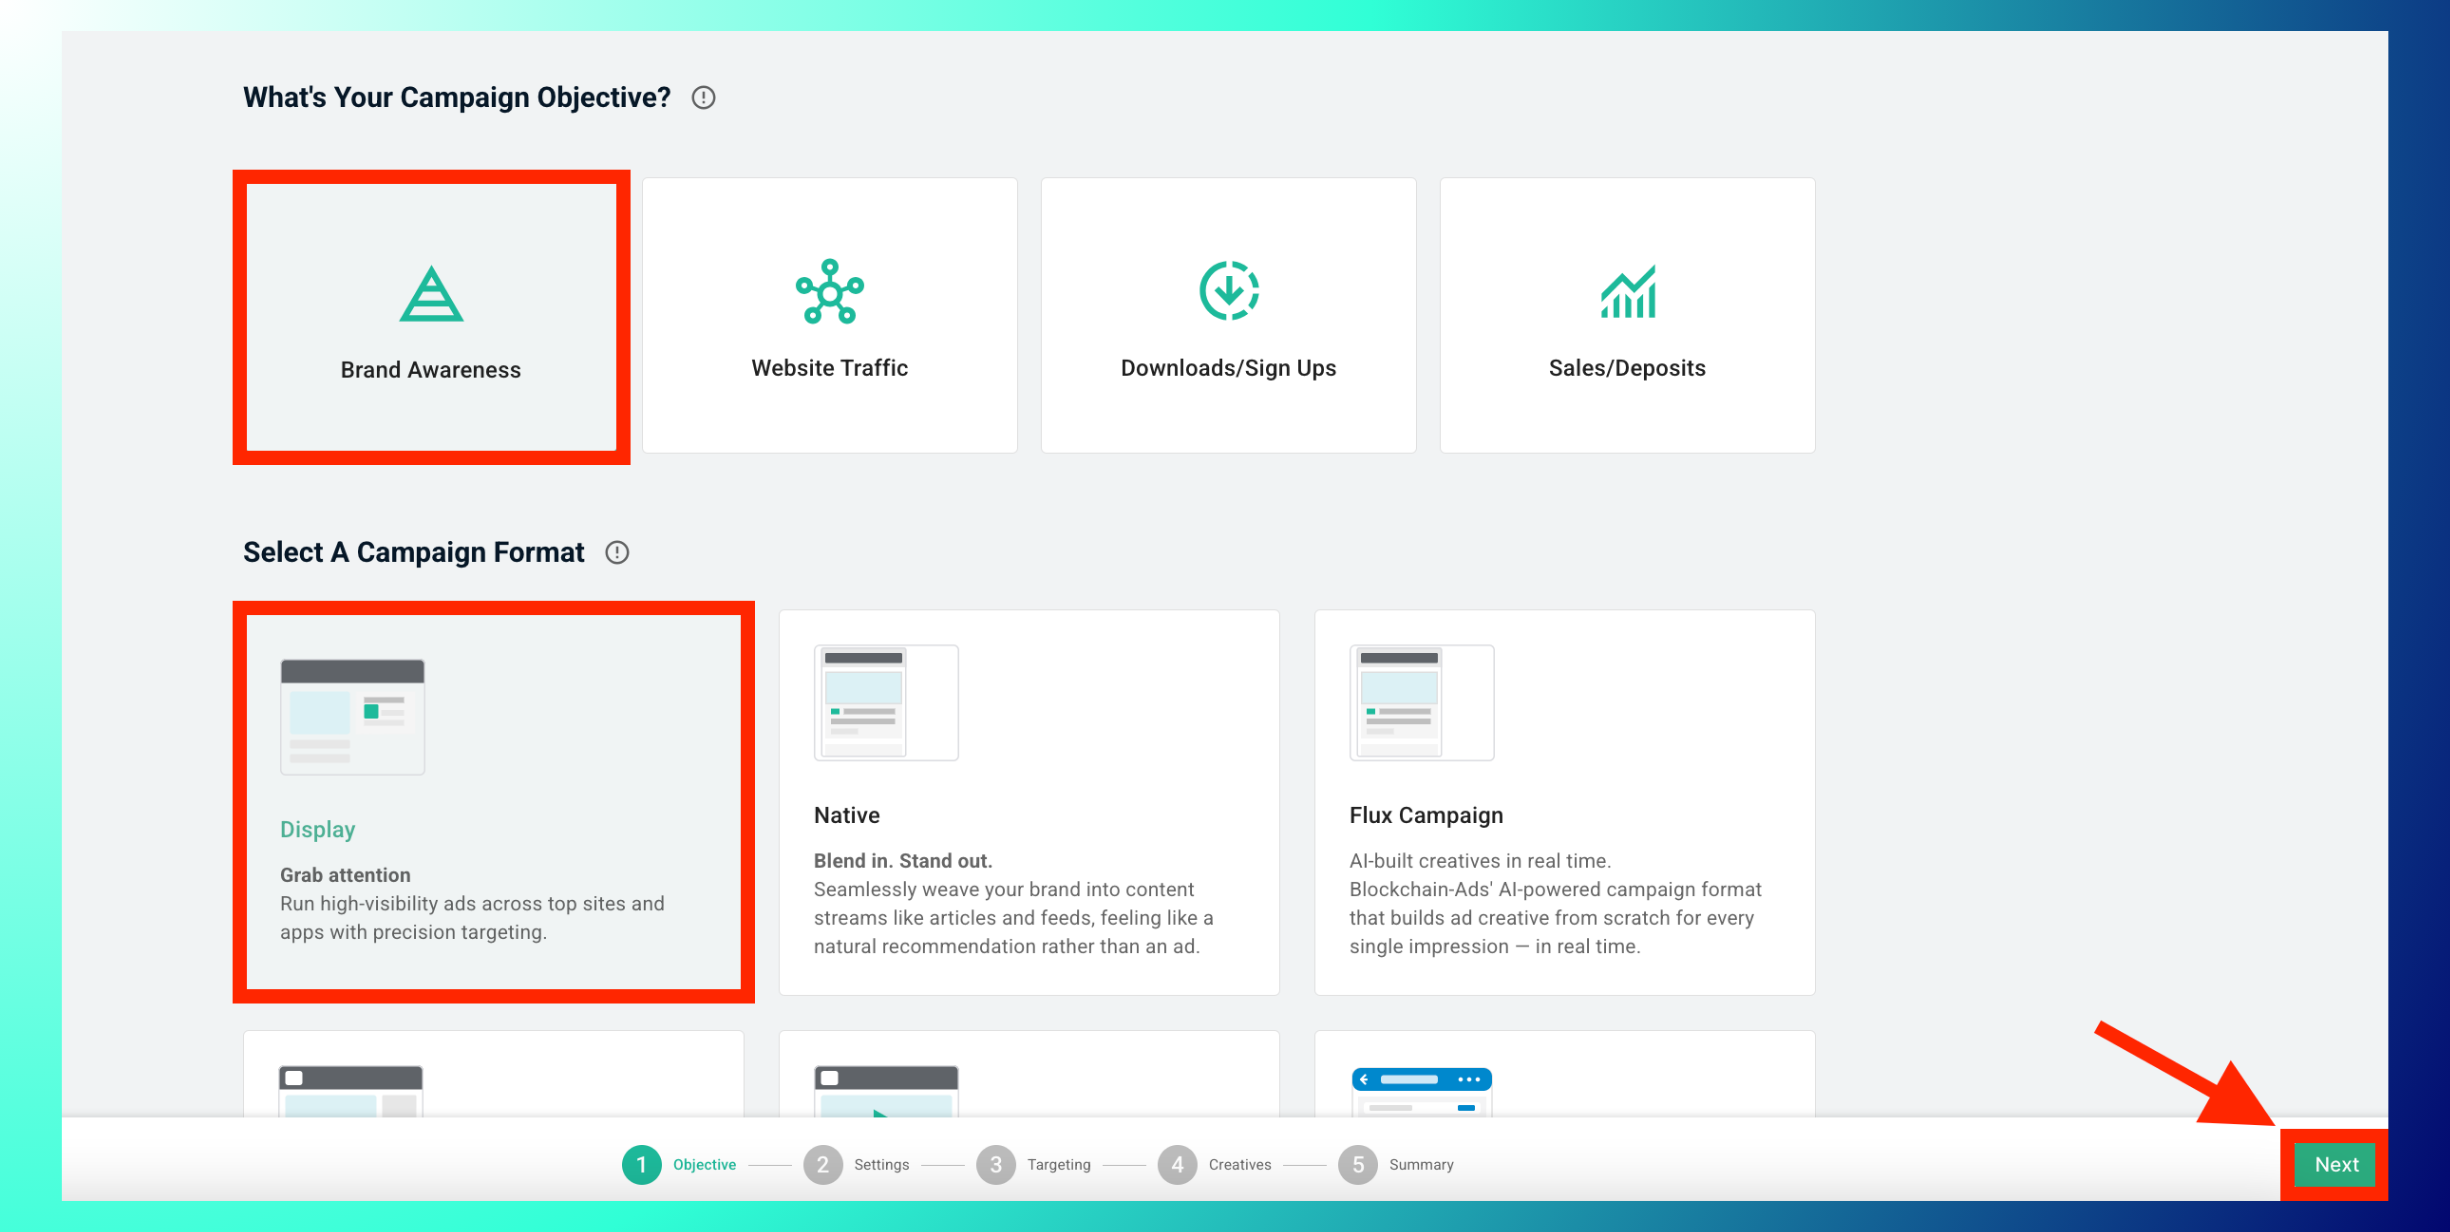
2. Choose Your Campaign Objective & Format
Select the objective and format that best fits your campaign goals. Then click Next.
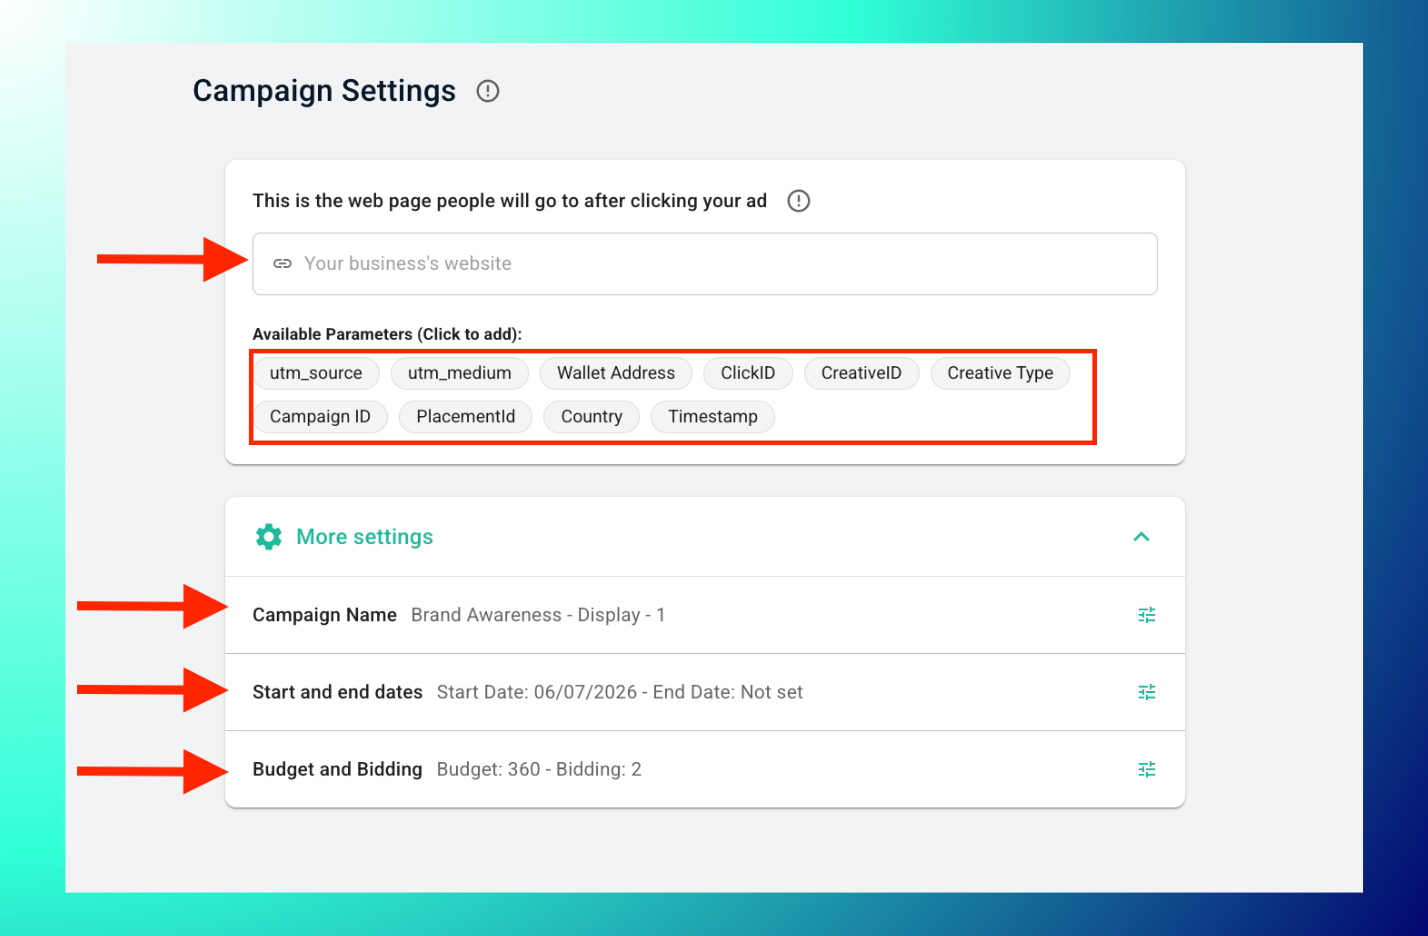
3. Insert Landing Page, URL tracking parameters and Campaign Details
Add the URL to the landing page you'd like to use and select a URL tracking parameter for your campaign, then enter your chosen campaign name. After that, set the campaign’s start and end dates and enter the daily budget you plan to allocate.
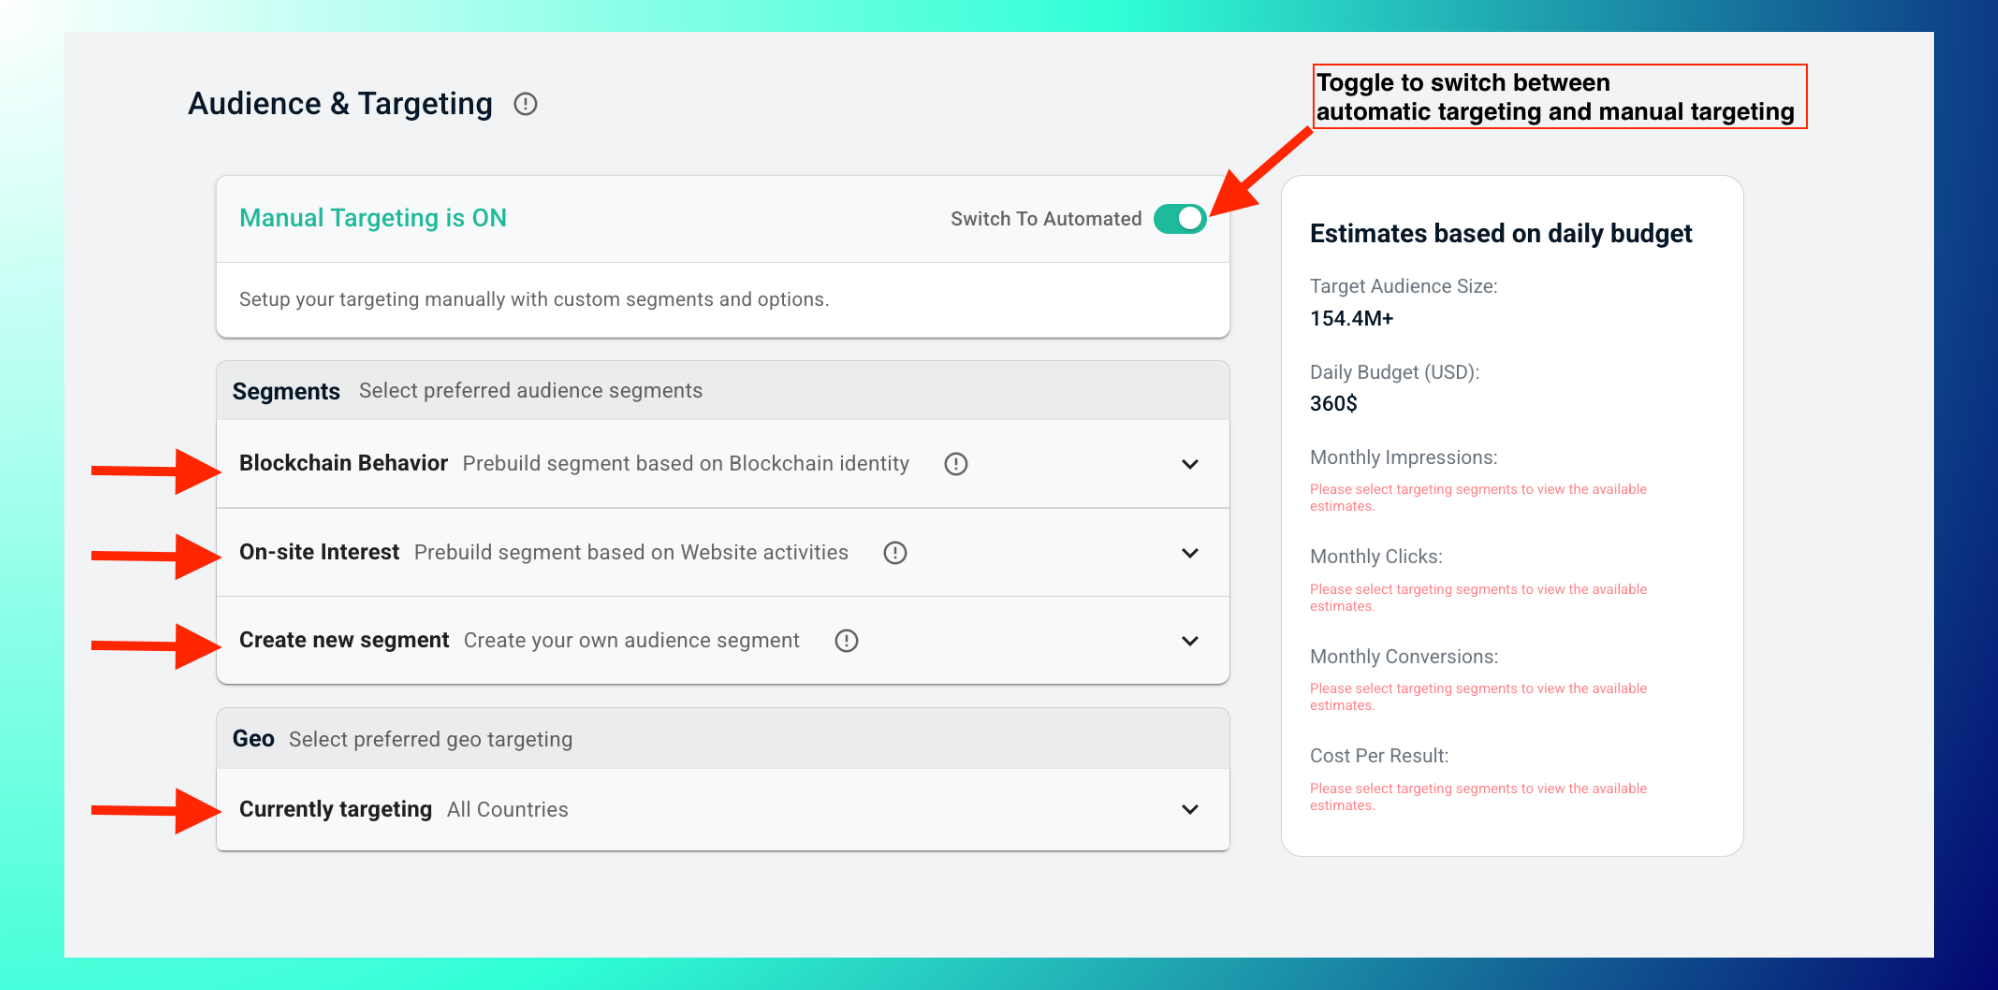
4. Set Up Audience & Targeting
In the Audience & Targeting step, choose whether to keep Automated Targeting on (recommended for most campaigns so the system optimizes audiences for you) or switch Manual Targeting ON to define segments yourself.
When using manual targeting, select relevant Behavior and On-site Interest segments. If needed, create custom audience segments so your campaign focuses on high-intent users that match your objective (optional). Once done, click next to proceed.
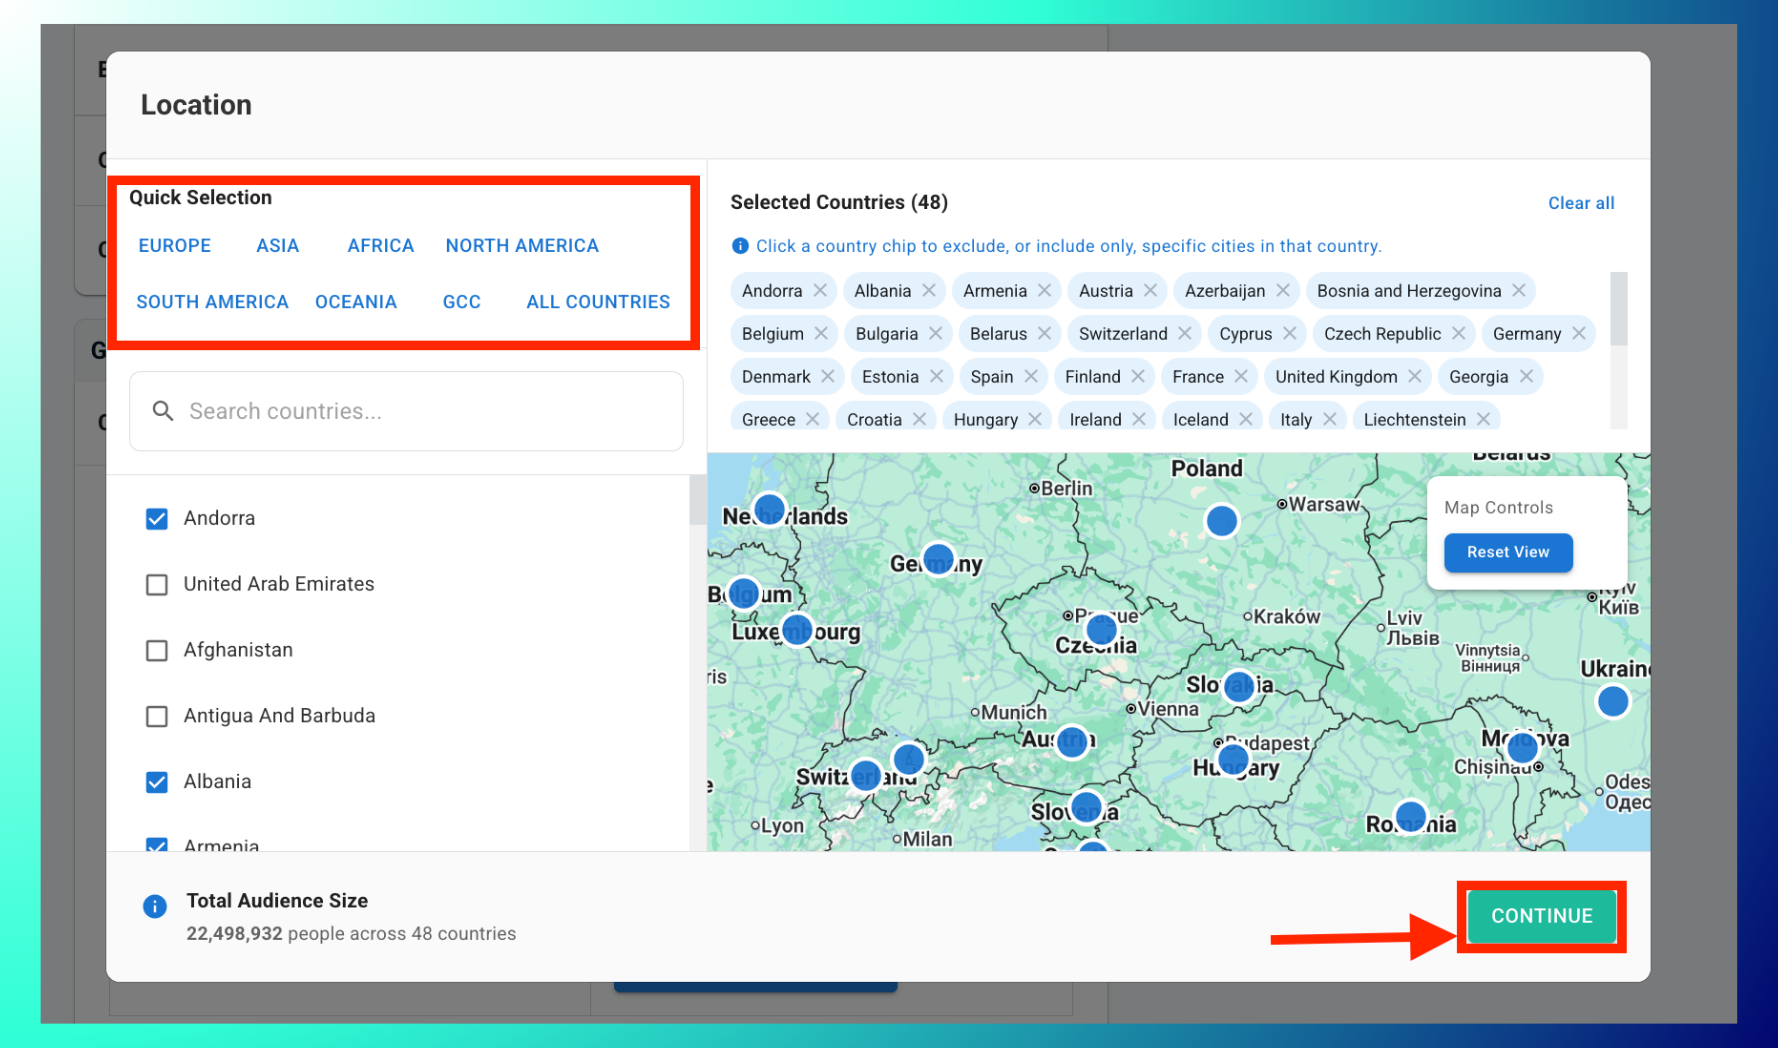
Select the exact geographic locations you want to target; you can target globally or specific regions. Click "continue" then "Next" to proceed.
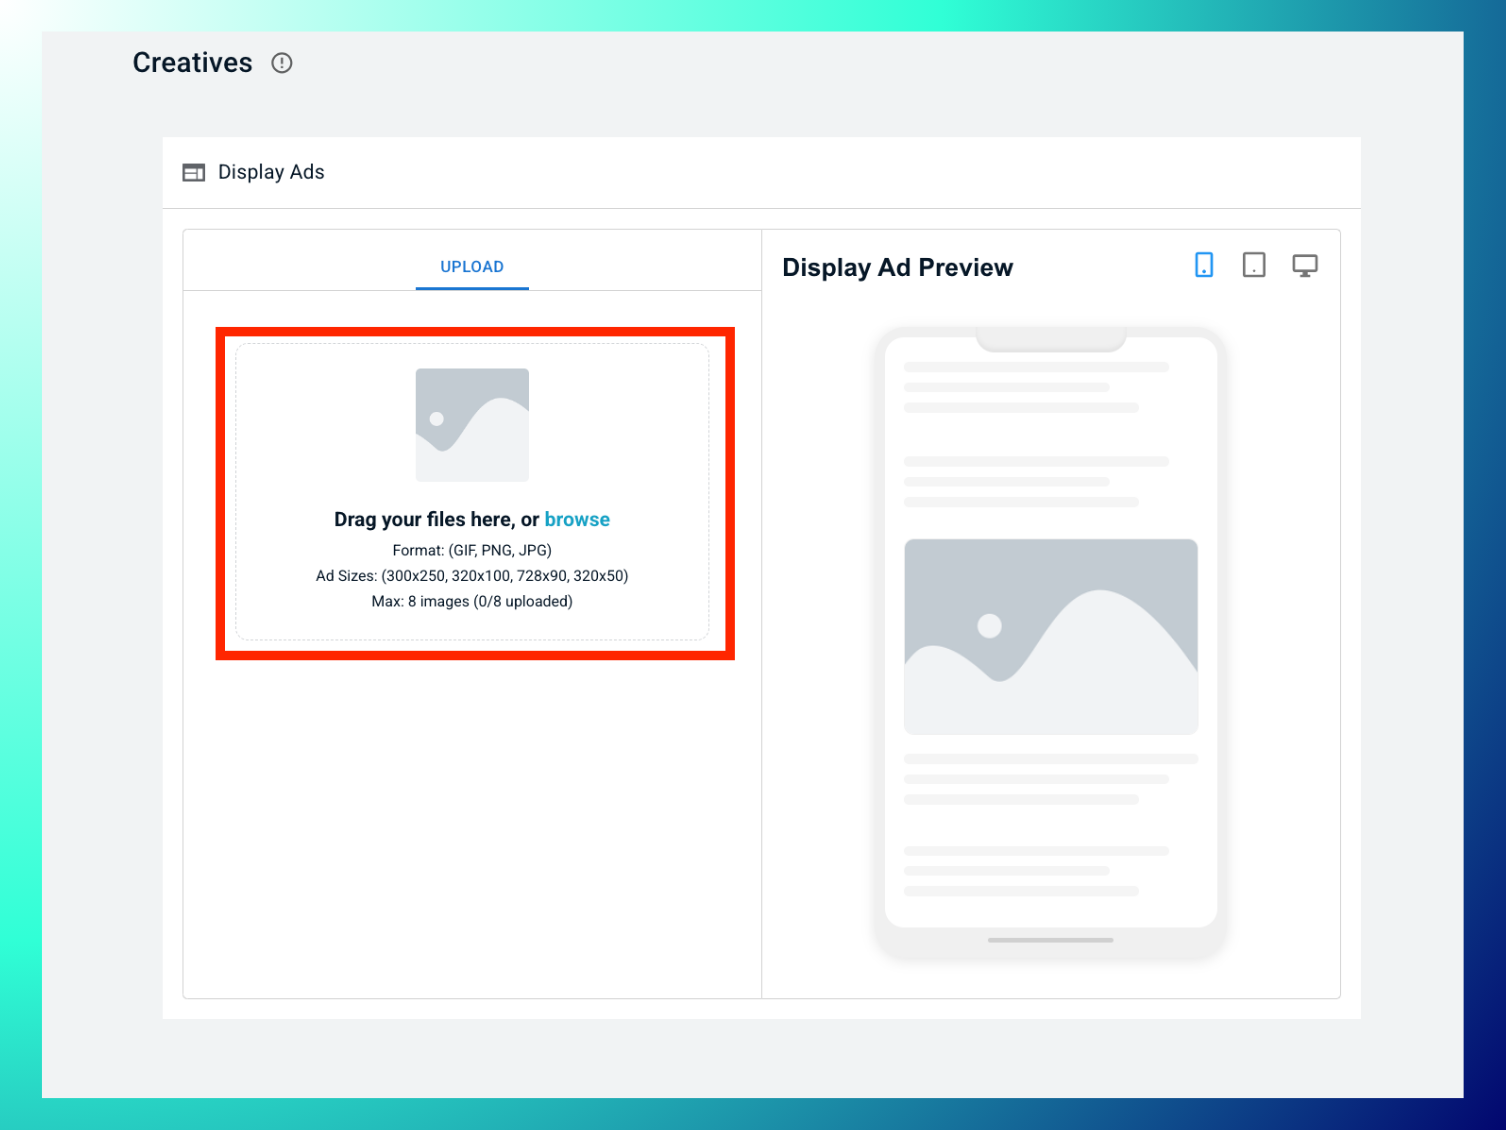
5. Upload Creative
Upload the ad creative you want to use in the campaign by dragging it from your folder and dropping it in Hub, or click to browse and select from your file. Make sure your ad creative assets meet the acceptable format specs. Once you've successfully uploaded your creative, click "Next" to proceed.
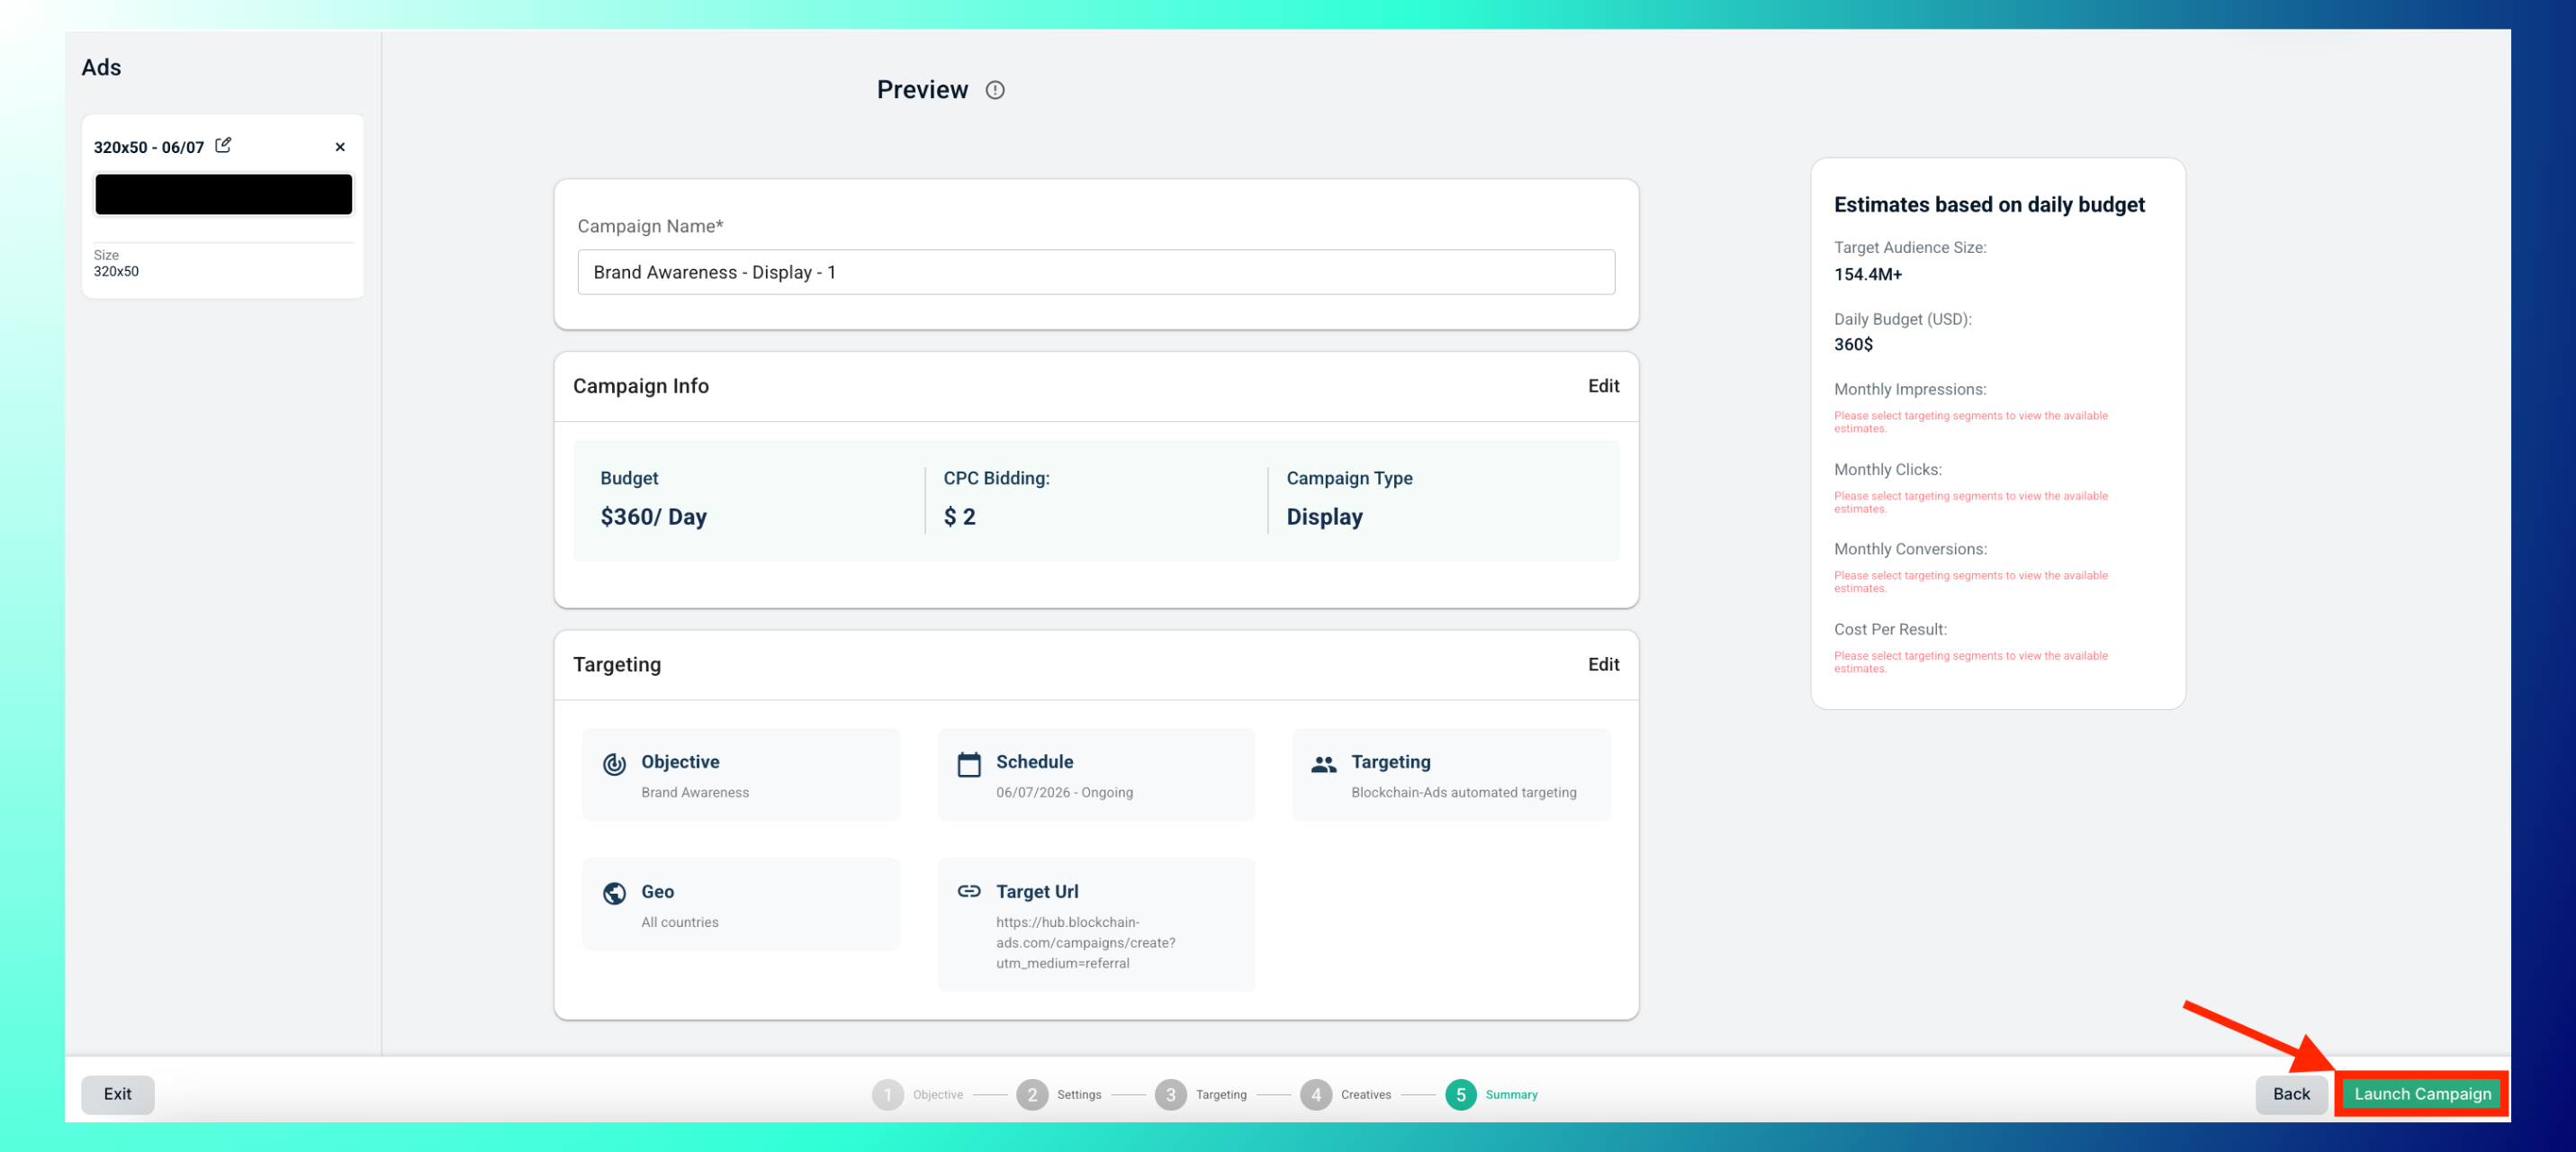
6. Review Campaign Summary
Double-check all details, targeting, budget, creatives, and schedule. Once everything looks good, click on "launch campaign."
Troubleshooting
Can’t submit? Check for missing fields (HUB will highlight them). Approval delayed? Email support@blockchain-ads.com with the campaign ID. No impressions? Verify start date, funding, and targeting scope-broaden if too narrow. Creative issues? Confirm file formats/sizes per Article 4. Error code? Search Help Center or contact support.
Table: Campaign Launch Checklist
FAQs
What happens after submission?
After you submit your campaign, it goes through a policy and compliance review to ensure your creatives and landing page meet Blockchain-Ads standards (e.g., no misleading claims, regulated-industry requirements, or accurate disclosures). Once approved, the campaign moves to “Active” status and becomes eligible to start serving traffic.
How long until my campaign starts delivering?
Once your campaign is active and your account is funded with at least the required minimum, traffic delivery typically begins almost immediately. The system can start serving impressions right away as long as budget, targeting, creatives, and schedule are correctly configured.
However, it is normal for performance to be volatile at the beginning while the algorithm optimizes; during this learning phase, Blockchain-Ads’ Nexus-powered AI tests different audiences, placements, and geos to find segments most likely to click, convert, or deposit based on your objective. As more data is collected, delivery stabilizes and efficiency improves, leading to better click quality, conversion rates, and ROAS.
How do I know it’s live?
You can confirm delivery in the HUB Campaigns tab, where the status will change from “Pending” to “Active” after approval. From there, use real-time analytics to verify impressions, clicks, and early conversions, especially in the first few hours of launch.