

Create a conversion
Every conversion you want to measure is created once, then installed. This is where a crypto exchange marketer defines "sign up" or "first deposit" as an event Blockchain-Ads can count and optimize toward.
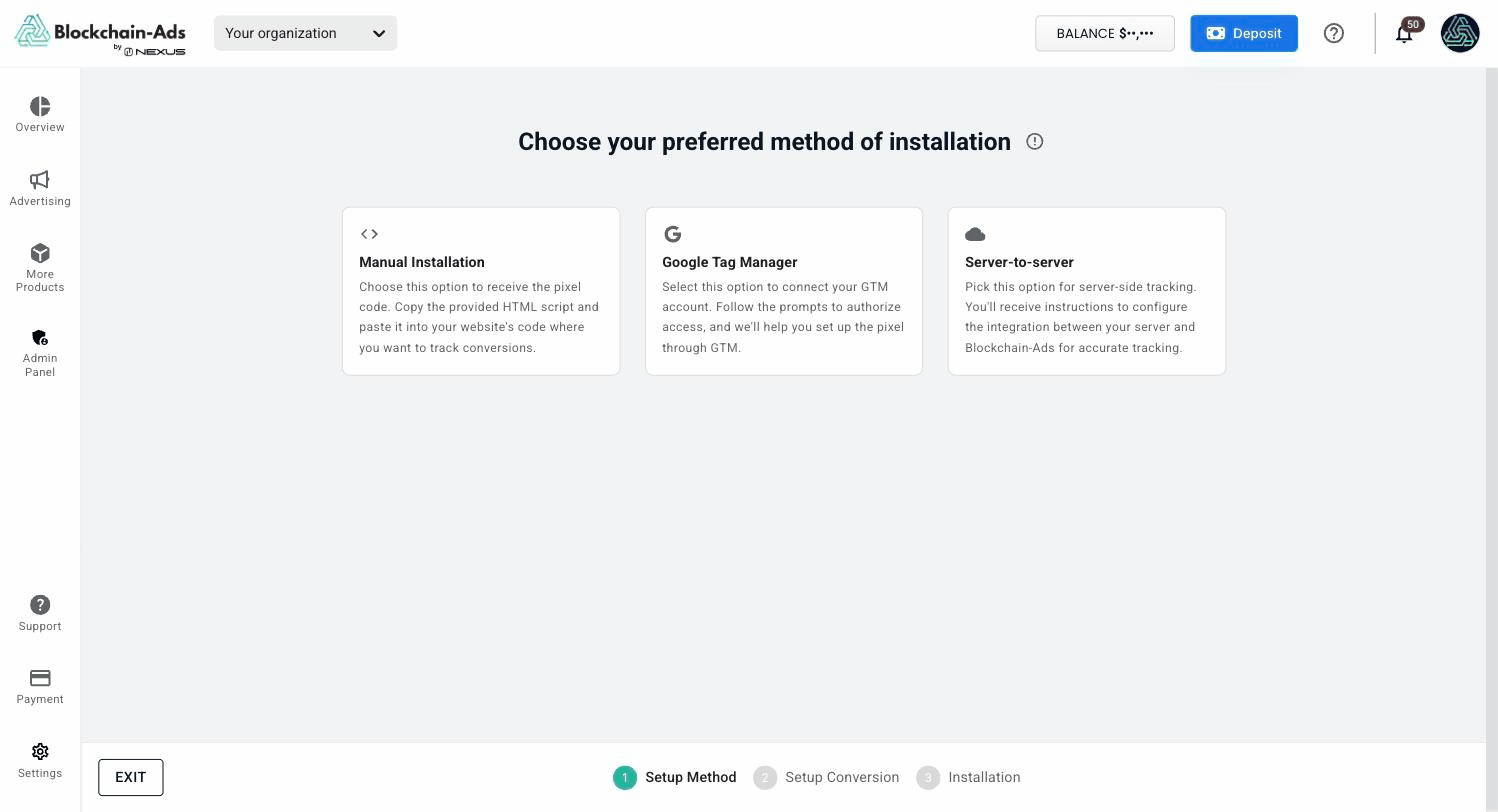
Creating a conversion is a three-step wizard: 1 Setup Method > 2 Setup Conversion > 3 Installation.
- Open Advertising > Tracking, then the Conversions tab.
- Click Create Conversions.
- Choose your setup method: Manual Installation, Google Tag Manager, or Server-to-server. The conversion then shows a Type of Manual, Gtm, or Server-Side.
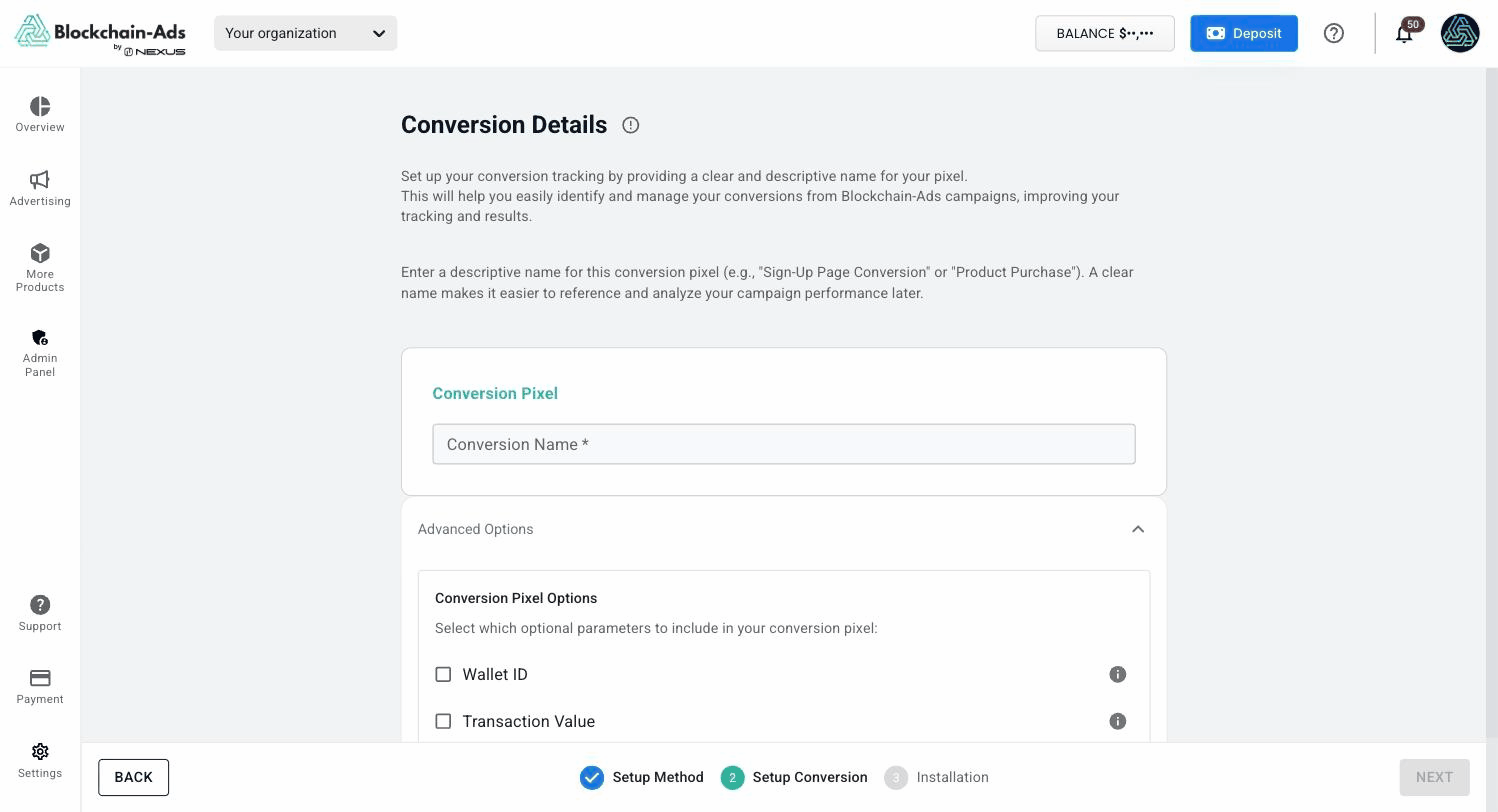
- Name the conversion for the event it measures, for example "Sign up" or "First deposit".
- Under Advanced Options > Conversion Pixel Options, add the optional Wallet ID and Transaction Value parameters if you want on-chain and revenue reporting. Each inserts a placeholder, {WalletID} and {transaction_value}, for you to replace with a real value when the event fires. Without them a basic pixel is generated, and Txn Value and ROAS stay empty in Reports.
- Save.
Get your installation code
Each saved conversion shows in the table with a Tracker ID and a code icon. Click the icon to open the Conversions Pixel window. It offers two formats:
| Format | Use it when |
|---|---|
| Tracking Pixel (JavaScript) | You can add a script tag to your page. The standard choice for most sites |
| Image Pixel (no JavaScript) | Your platform will not accept a script tag |
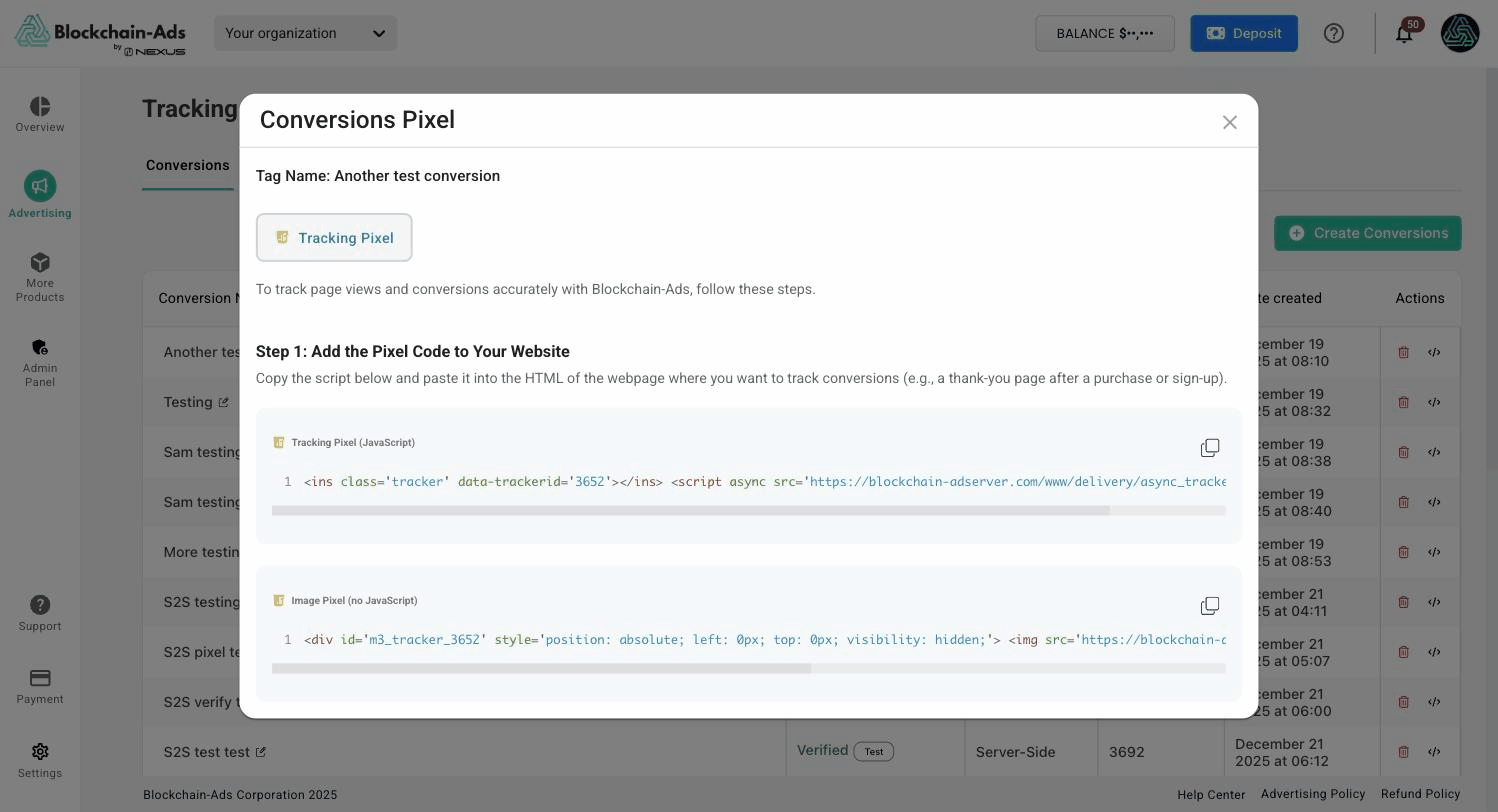
If your conversion's Type is Server-Side, the same window shows a Server-to-server Pixel instead: a URL you call from your own backend, so the event never depends on the visitor's browser firing it.
Status
Each conversion shows a status. It reads Verified once the platform has received a valid event, and the row carries a Test control you can use to confirm the setup before you rely on it live.