Selecting an objective is the first step to creating a campaign; it tells the platform how to optimize your campaign for the best results. Once you're in the hub, click on "create campaign," and a new page will open with the campaign objective options, as shown below.
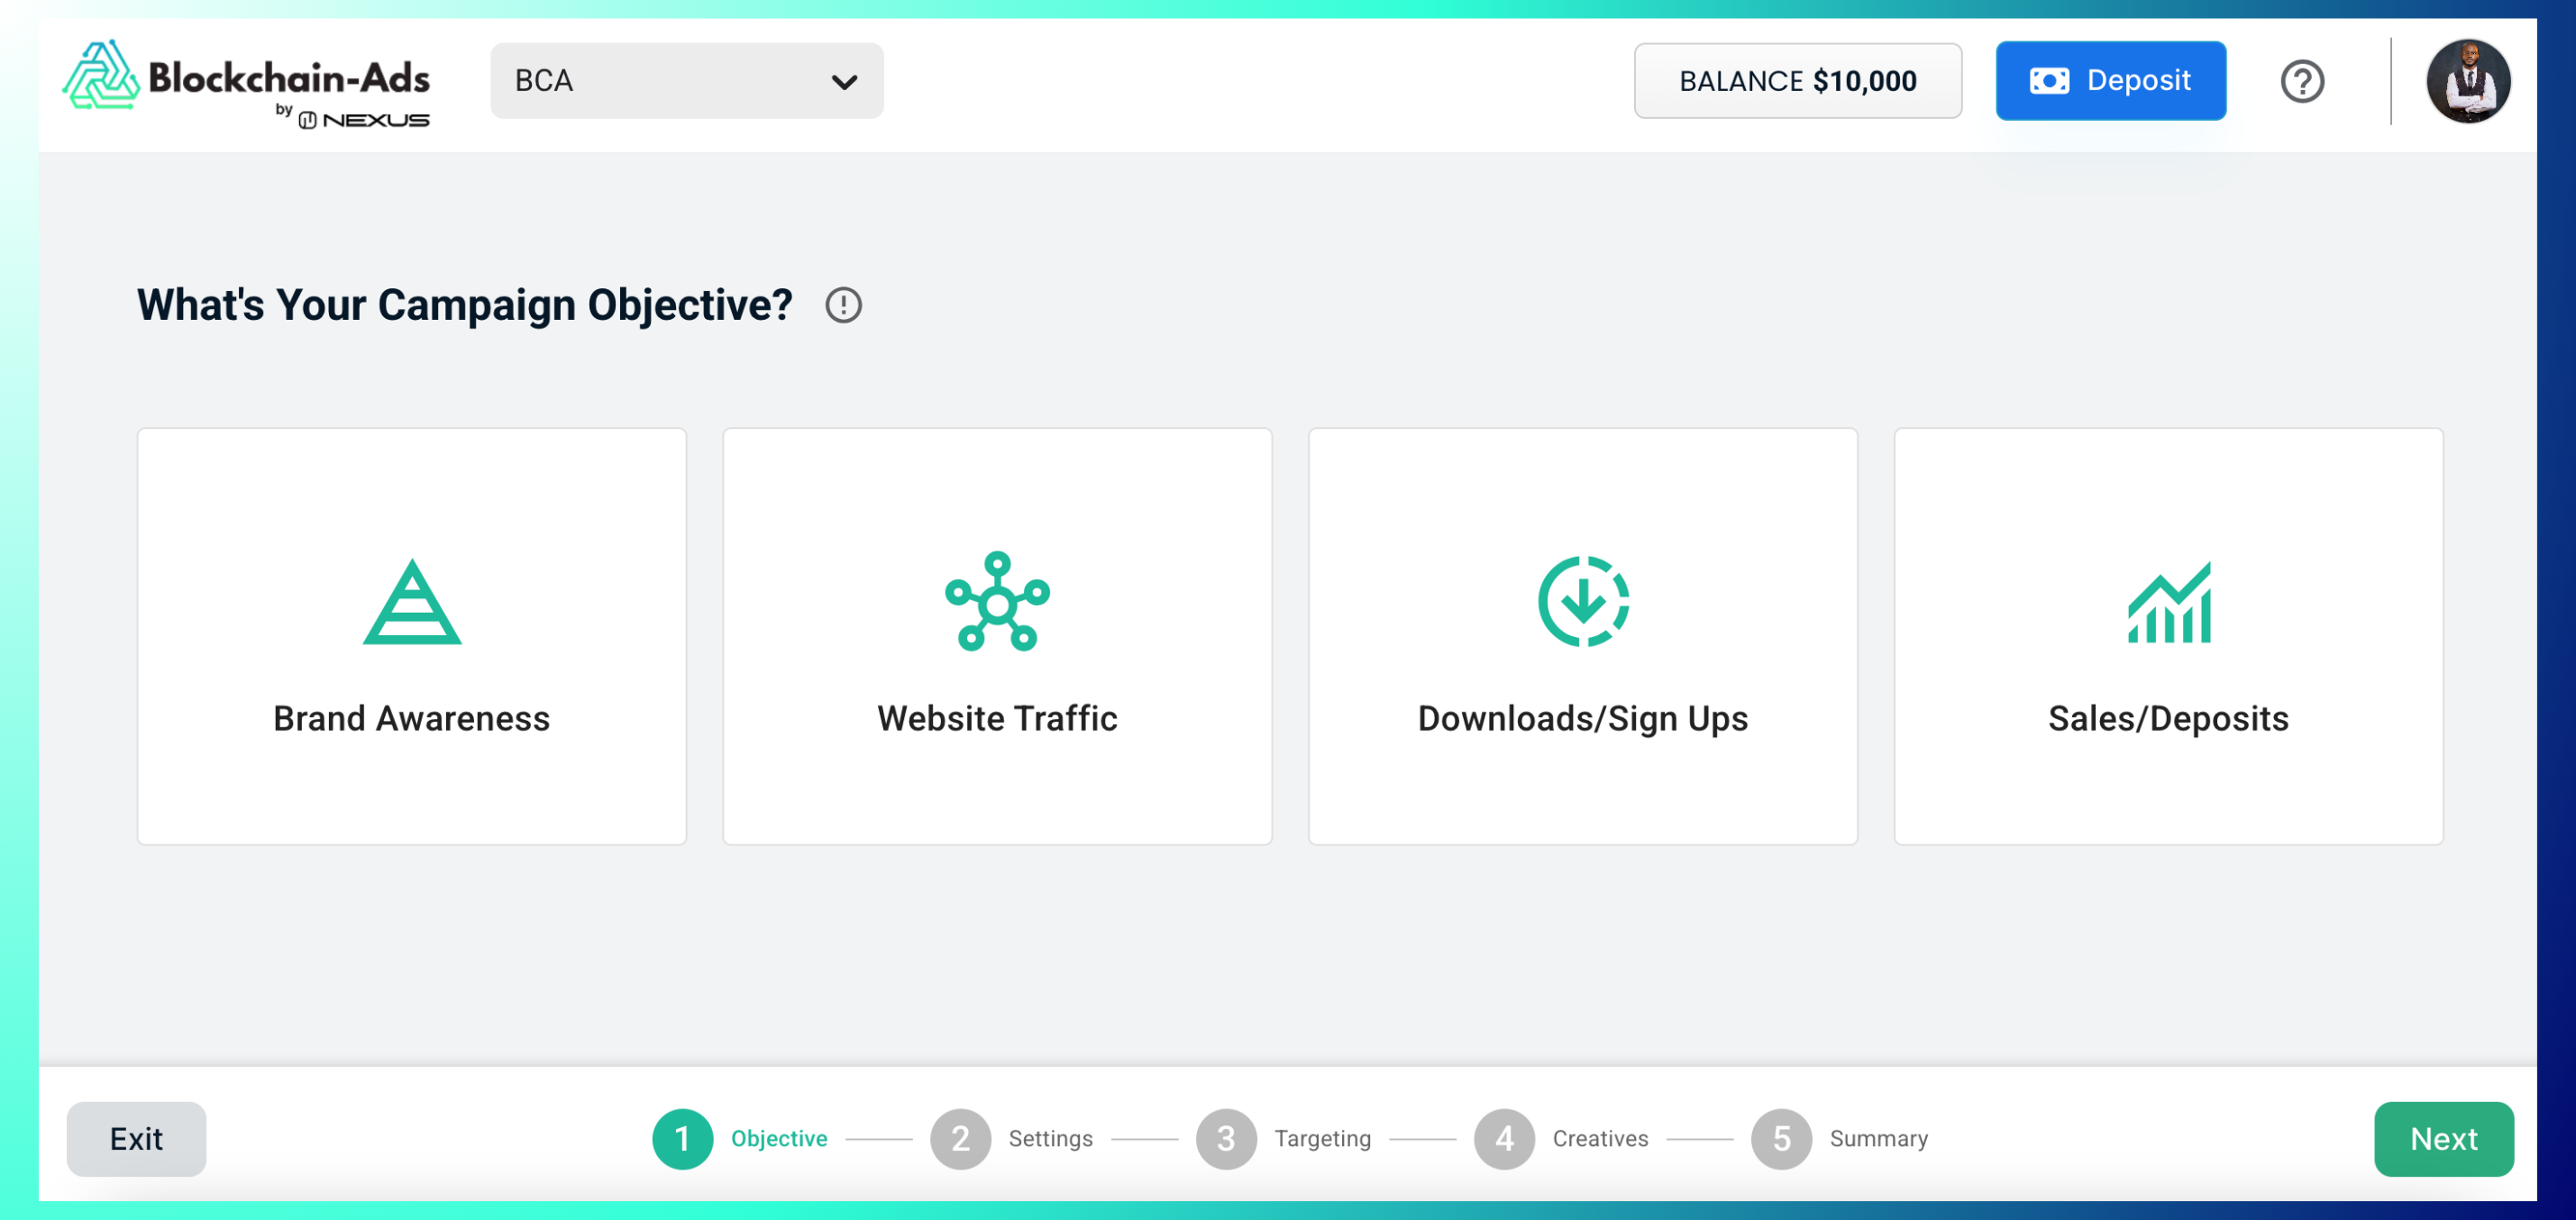
Here's a quick review of the four available objectives to help you choose the one that matches your primary goal:
Brand Awareness
Use this when you're launching a new product, entering a new market, or building recognition before asking users to act. The platform optimizes for maximum reach and impressions rather than clicks or conversions, so this is the right choice when visibility matters more than immediate response.
Website Traffic
Use this when your goal is to get users onto your site or landing page — for content engagement, product exploration, or driving volume for future retargeting. The platform optimizes delivery toward users likely to click, prioritizing CTR over reach or conversions.

Downloads/Sign-Ups
Use this for user acquisition goals like account registrations, app installs, or newsletter sign-ups. The platform shifts optimization toward users who are likely to complete a form or install, rather than just click through.

Sales/Deposits
Use this for bottom-funnel, revenue-driving goals — purchases, deposits, or any hard conversion event. The platform prioritizes ROAS and conversion volume, targeting users most likely to complete a transaction.

Important note: The platform will use this to prioritize delivery (e.g., more impressions for awareness); you can edit it later if needed.
Best Practices: Match your objective to your marketing funnel (e.g., awareness for new launches and sales for conversions); use pixel tracking for precise metrics; start with website traffic if unsure; test one objective per campaign; monitor HUB reports and adjust if metrics misalign.
Key Metrics per Objectives
FAQs
- How does the objective influence the campaign? It guides the algorithm—e.g., awareness maximizes impressions, and sales boost ROAS-focused conversions.
- Can I select multiple objectives? No, one per campaign; create separate campaigns for multiple goals.
- Goal doesn’t match exactly? Choose the closest—e.g., sign-ups for registrations, sales for deposits.
- Does objective affect approval? No, but creatives/landing pages must align to pass compliance.
- Is the objective working? Check HUB for metrics like impressions (awareness) or conversions (sales) and adjust if needed.
- Default objective? None—you must select one during setup.
- Can I combine objectives? Run multiple campaigns with distinct objectives for layered strategies.